I needed to measure the widths of an object that is greater in radius than the length of my caliper arms. So that was the first problem. But also the object I wanted to measure is irregular (like a wine glass) and therefore I wanted to know the width of the object over a range of specific heights – so that I could map it out and create a model of it. And, that was the birth of the multi-axis calipers (the “MAC”).
On the one hand, the MAC might be awesome because I could not find anything like a 2-axis caliper doing a quick Google search. On the other hand, if no one has made one before… there is probably a good reason. Nonetheless, I am pressing on with my multi-dimensional idea…

I began the design process by creating a simple but large caliper (200mm opening). I made the arms longer than typical (about 140mm). In addition, I made the sliding element (the “x-slide”) removable and also created a mounting feature in the x-slide that allows a thumbwheel to be added. I found the thumbwheel quite beneficial as sliding the x-slide along the plastic main x-axis was difficult to do in minute increments. And, I made the sliding element removable so that the entire assembly could be collapsed for storage. I also made the main x-axis component foldable. The folding idea trades compactness with effectiveness so I have created both folding and non-folding versions. But the folding version is just cooler.

By this point, I could see that precision was going to be limited (especially the folding version) but I could live with that. I am thinking around +/- 1mm accuracy if you take your time (+/-2mm or worse if you do not).
I initially had the idea of using magnets to attach my existing digital caliper to the MAC (piggyback it on) so it could give me a more accurate readout. But I removed that from the final design. It is not really needed because you can simply use the digital calipers to measure the opening on the MAC arms at any time if you want to. But because of flex and play, I don’t think I can get any kind of accuracy better than +/- 1mm so I just read the measurements off the printed scales I have incorporated into the design.
The non-folding versions obviously give much better accuracy so factor that into your choice of which to print. For what it is worth I am only using the folding version because, with patience and care, I feel I can get pretty decent measurements (aka good enough measurements) and keep the advantage of being able to fold it all up and put it away until needed again.
So the basic caliper became the starting point for which to add a Z-axis. Conceptually, it was quite straight forward but again making it useable and accurate (enough) is the challenge. I added a connector (the “X to Z Connector”) which slides along the x-axis and allows a z-axis to slide up and down inside that.

However, allowing the z-axis to slide makes using the entire assembly super difficult. So instead of leaving it to slide freely, I added detents every 5mm. So when mapping something vertically you set a height (say at 10mm) and then measure the x-axis. Shift the z and repeat. If there was a future improvement on this it would be to use a rack and worm gear – maybe one day if I have nothing else to do.
Even with the z-axis snapping into position the entire assembly was still super awkward because it wanted to fall over while I was focused on measuring and holding the object. So I added a snap-on and adjustable stand. The stand snaps onto the back of the z-axis and the legs can rotate forward to find an optimal position.

When using the caliper it is important to go slow and make sure you are finding the dimensions of anything you are measuring without stressing the caliper which would cause it to flex. Also, because of the folding components you need to carefully check that all the members are square when using the MAC. This means going slow and being methodical.
I started the idea as a “2D” caliper or a 2-axis caliper with long arms. But I could not resist the glory of saying “I have made the first 3-axis (and possibly the first 2-axis) caliper in the world”. Ok maybe just in “my” world but whatever – it is still pretty cool. Anyway… to do that I added a y-axis slide onto the x-slide and voila… the world’s first 3-axis caliper! I am not sure the 3rd axis has any meaningful usefulness but it is there and maybe it helps – maybe it doesn’t.
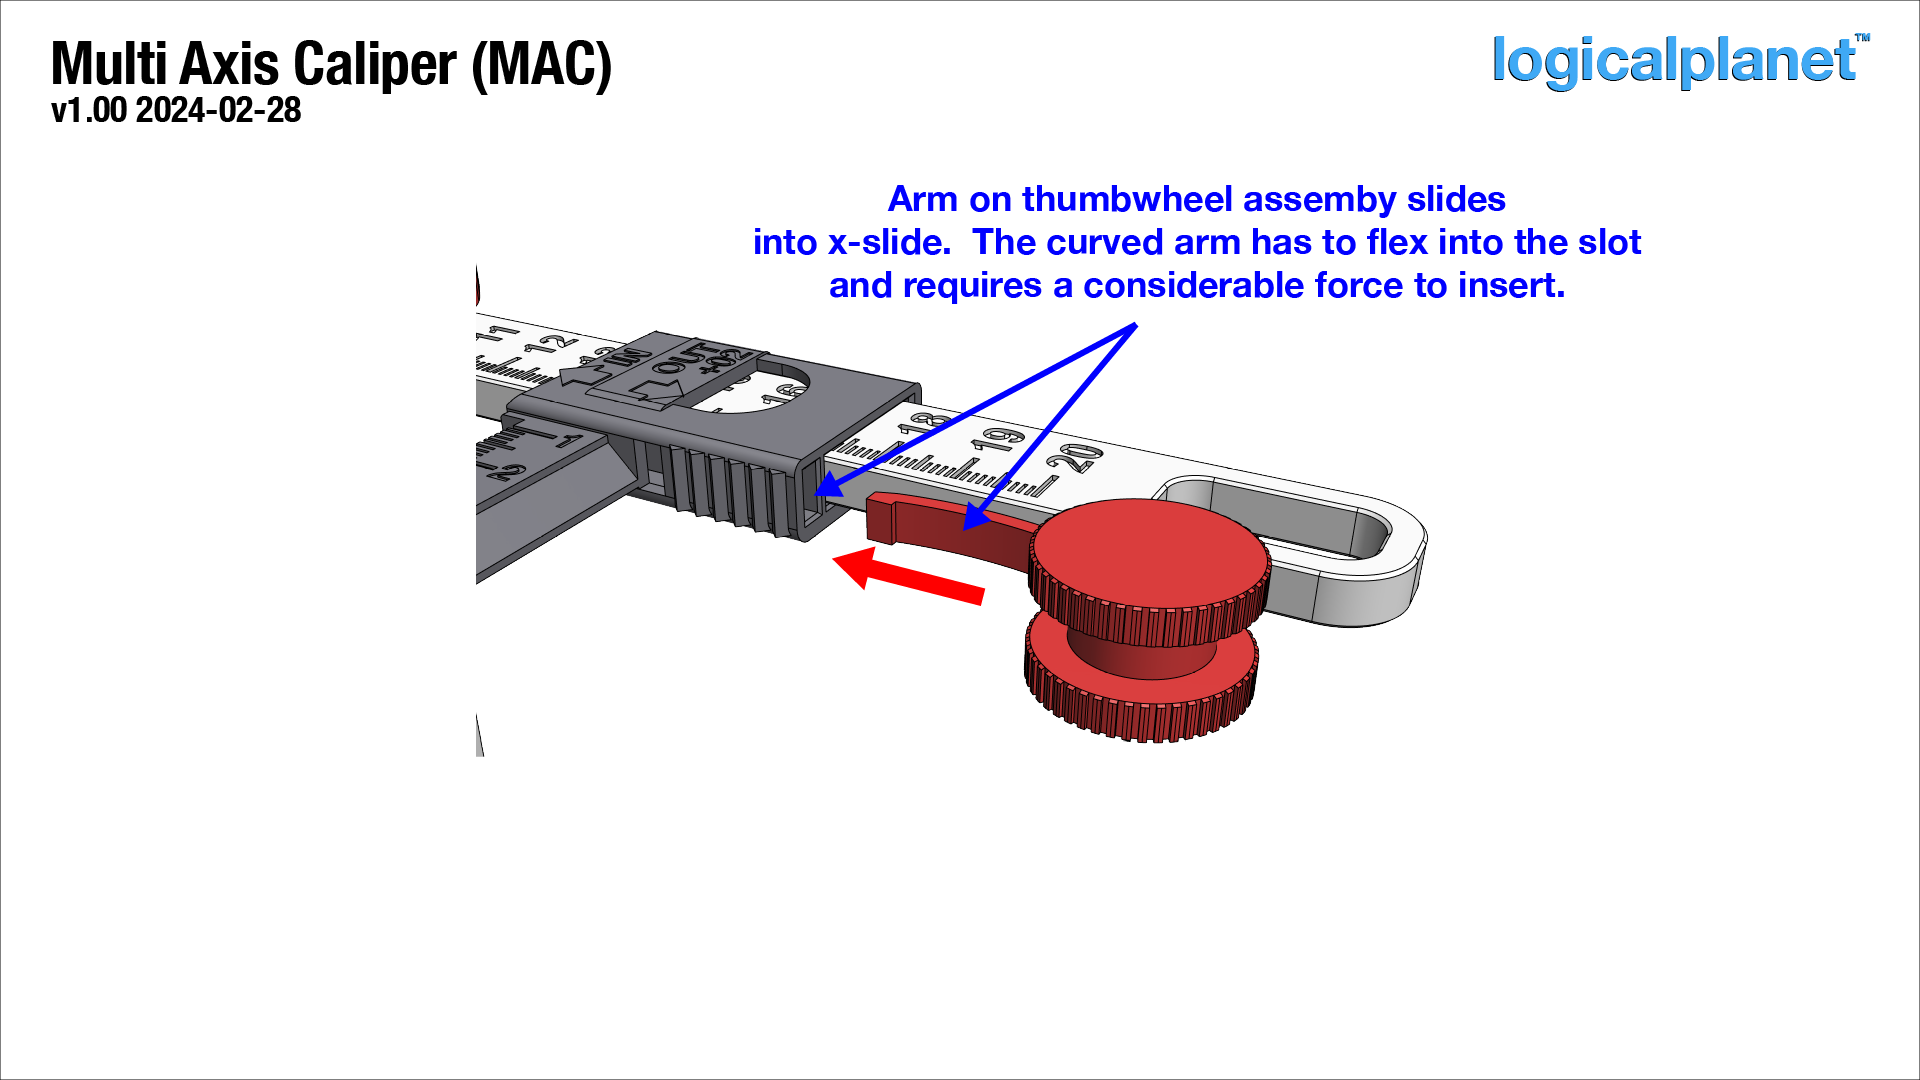
Thumbwheel: The thumbwheel is interesting. I originally tried to use a rack and pinion approach to move the x-axis but it was too cumbersome. In the end, I essentially mimicked the design on my digital caliper and while I am not sure why it works as well as it does – it works well. The thumbwheel is split and rides on either side of the x-axis. Pressing firmly while spinning it moves the x-slide.

Installing the thumbwheel involves inserting the arm on the thumbwheel assembly into the slot on the x-slide. A considerable amount of force is required to get it in as the arm is curved to prevent it from coming out after it snaps into place.

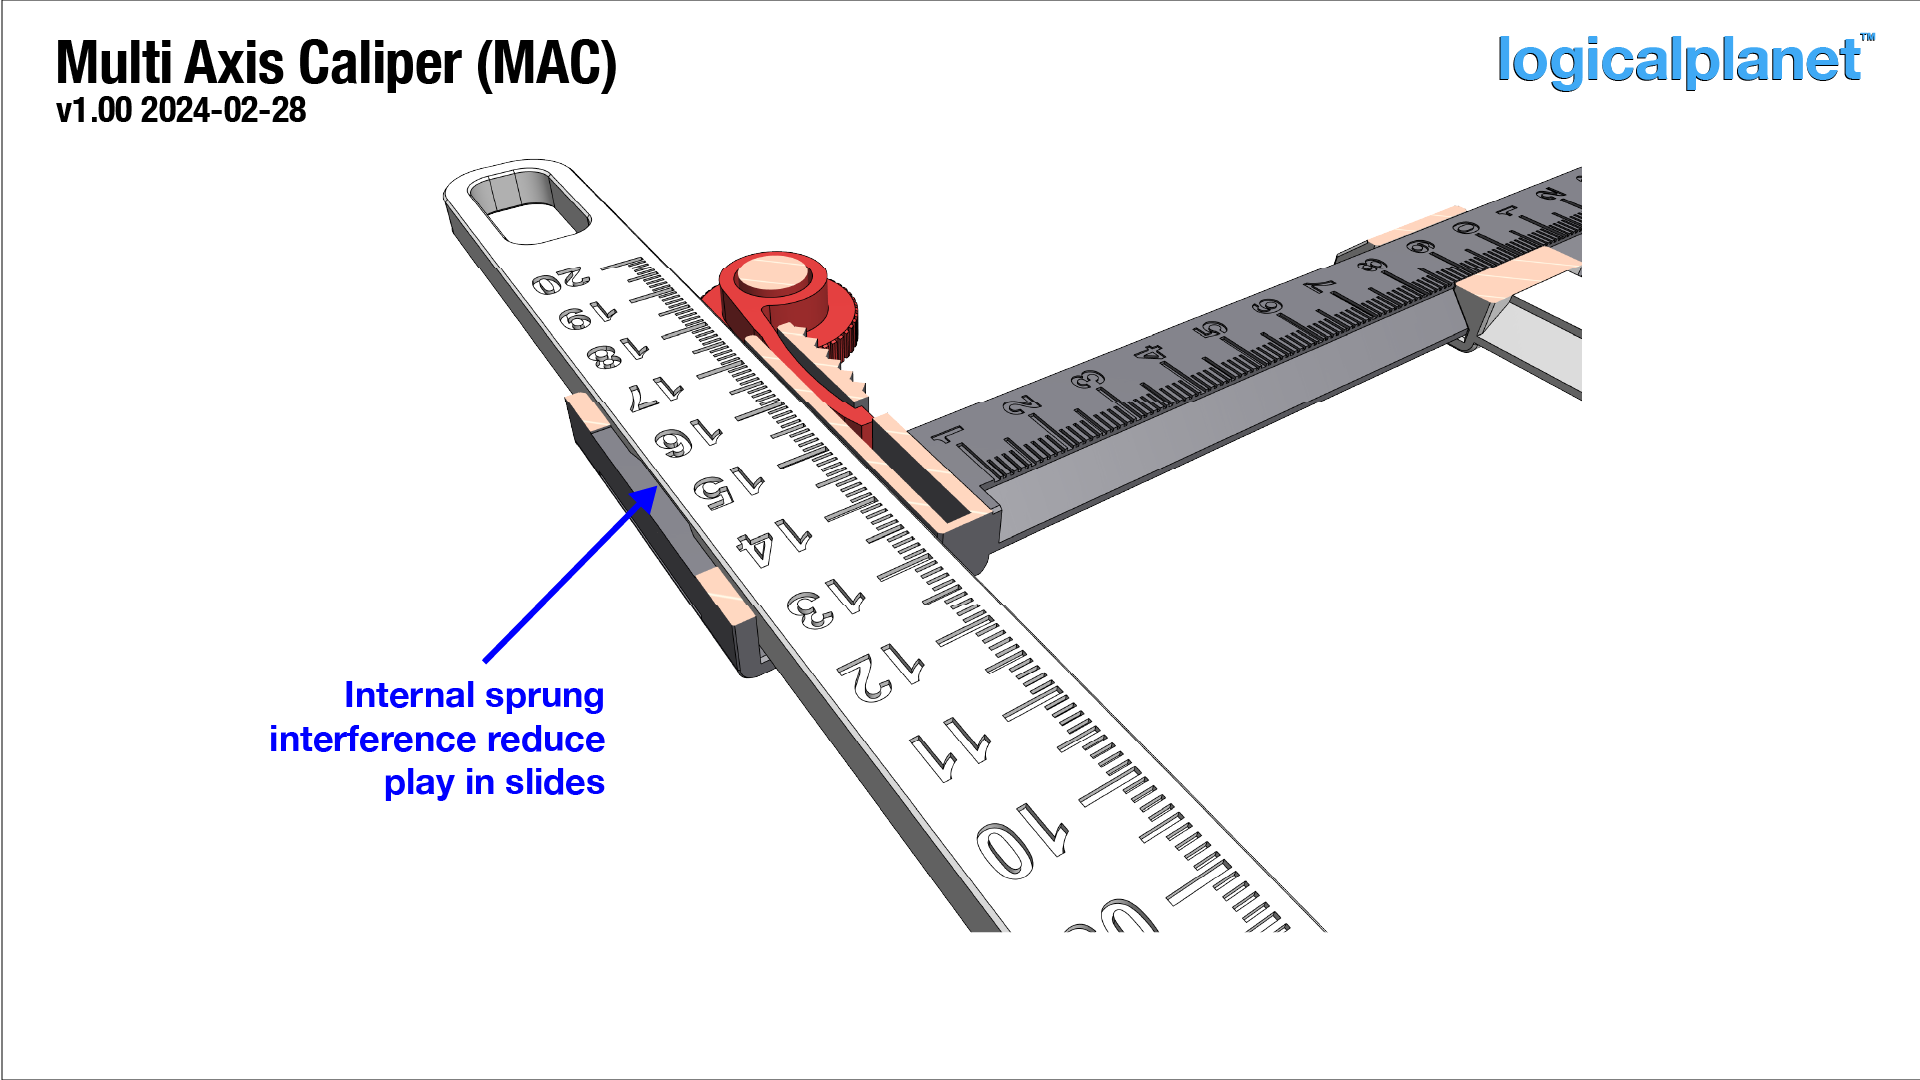
Interference in Slides: I have added some sprung interference into the slides. By doing this I was able to leave enough space in the slides to allow relatively smooth movement. The sprung interference tries to take up the slack so that the sliding element remains square to the frame. If this is too tight slide the sliding element back and forth a few times fast and it will effectively sand it down.

Folding vs. non-folding: As noted above, I have consciously traded a little accuracy to make the entire thing collapsible. Since I will use this infrequently, I want to be able to put it away somewhere until needed. But if you want the best this can be, print the non-folding parts.
Tolerances: Everything fits together pretty tight. So I recommend using my print settings as closely as you can. If the parts you print are loose then review your print settings and check you are not under-extruding. If the parts are too tight, try cleaning all the edges, and or sanding the tight areas.
Printing
I have tried to make my main print settings visible on the Cura screenshot but in case they are difficult to read I have summarized them again here…
Material: I recommend something stiff, like PLA or ABS. But I have printed this all in PETG. The flex of PETG does not lend itself well to the accuracy of measurement. But I had PETG loaded already and it does work.
My Setup:
Nozzle = 0.4mm
My Settings:
Layer height = 0.2mm
Line width = 0.45mm
Wall count = 4 (1.6mm)
Infill = 40%
Support:
Designed to print without additional support. All necessary support is designed in.
The thumbwheel has support that will be tight and therefore require needlenose pliers to remove. The tightness is intentional to make sure the gap in the thumbwheel mates with the edge of the x-axis.

During one print, I had the edge of the x-slide curl up from my print bed which is quite unusual with PETG. But because of that, I added a small pad at the end of the piece to help with bed adhesion and ensure the edge of the slide is straight. You can break that off after printing.
Print Orientation: As shown in the screenshot(s).


Leave a Reply