See wallplatemate.com for more product information.
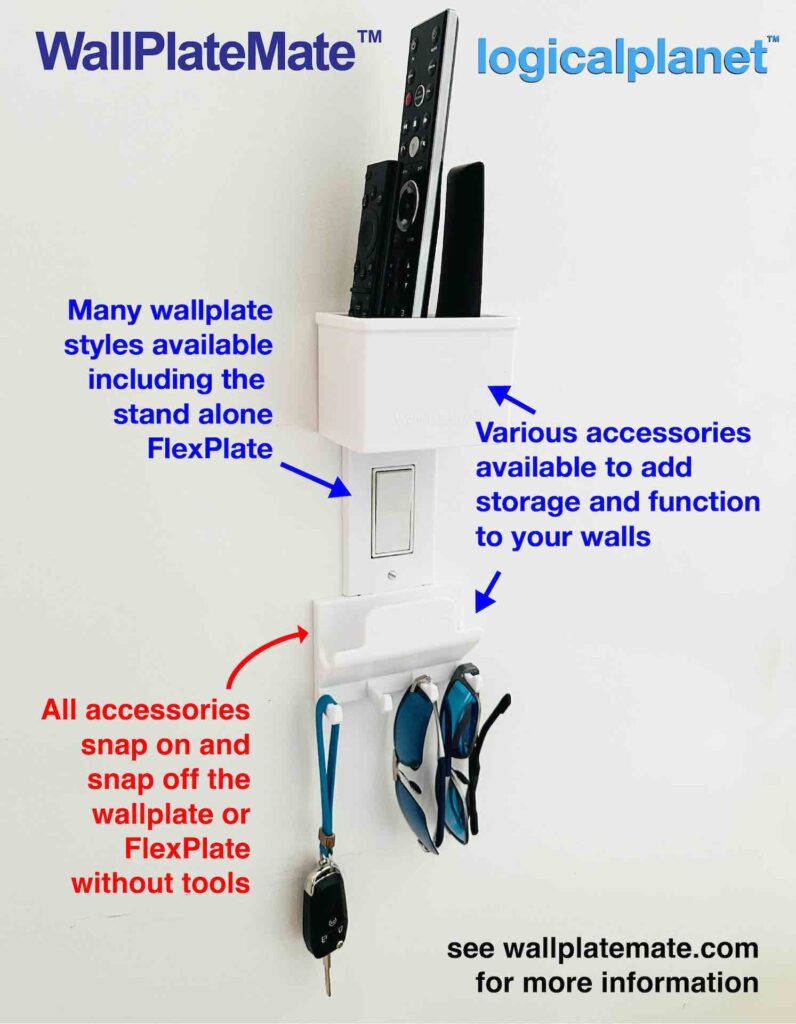
So this is a big one for me… It has evolved out of a few simple ideas and has become a lot of different parts that all work together to make my life better. And, I hope it will for you too. I originally started out trying to create a flexible modular wall mount plate that I could use to attach things to the wall (think tools, glasses holder, keys, hats, etc.). I call it the “FlexPlate”. I wanted to attach the FlexPlate to the wall and then snap on and off various accessories. My first implementation was for a flashlight and its spare rechargeable battery packs. This was the first half of the project.
Around the same time, I was playing with the idea of expanding the functionality of wallplates (for switches and electrical outlets) adding phone holders and glasses holders for example. That was the second part of the project.

And, then what seems so obvious now but was not immediately for me at the time, I realized if I combined the two ideas I have a really good concept. And that was the birth of the WallPlatesMate. It is best to check out the video (linked above) to understand it. And, I have also created a product summary page at wallplatemate.com.
So far I have made accessories for glasses, wallets, keys, hats, gloves, coats, flashlights, bottles, tools, cameras, platforms, phones, remote controls, and more.
From a design perspective being able to swap off and on various attachments just makes sense and also allows me to make iterations of designs and test them quickly and easily. But from a user perspective, there are also many benefits…
- Anyone who rents or otherwise does not want to put holes in their walls, can swap any existing (North American style) wall plate for a WallPlateMate and instantly add more storage and functionality without adding any holes or marks to the walls.
- In smaller homes or in fact, any home you can create new storage and functionality that was previously overlooked. It’s like finding money! ok, not quite the same but finding space is pretty good too.
- Anytime you want you can remove the WallPlateMate and put back the original wallplate without leaving a mark. You can also relocate the WallPlateMate or take it with you when you move.
- Of course, once the WallPlateMate is installed you can swap on and off different accessory options for different functionality.
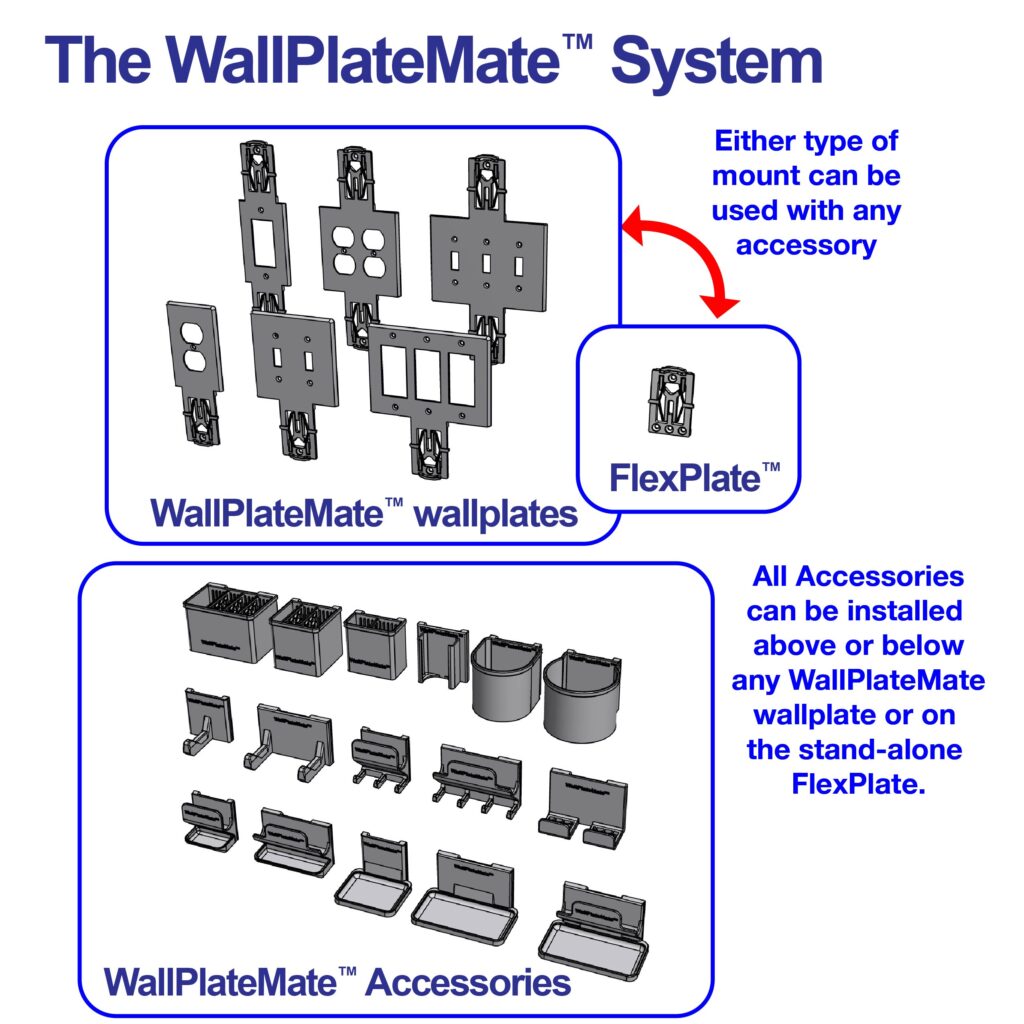
- WallPlateMates can be installed up or down so that accessories can be attached above or below the switch or outlet. I also have versions with the FlexPlate on both top and bottom so you can use it above and below the wallplate if you choose.
- Alternatively, just the FlexPlate itself can be installed (stick-on or screw-on versions available) anywhere allowing all the available accessories to be used anywhere (not just at existing switches and outlets).

The Design
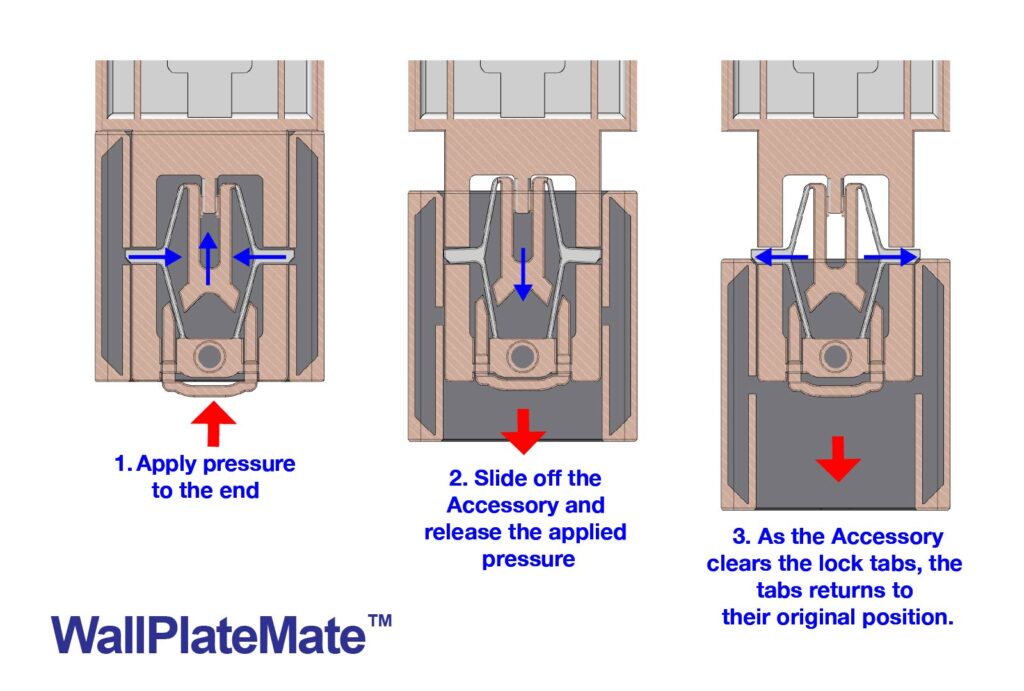
The heart of the WallPlatesMate design is the FlexPlate which allows accessories to be attached in any orientation and locks them in place easily. The FlexPlate has two rails (one on each side) that the accessory slides onto. The groves on the accessory that ride along the rails of the FlexPlate have a small gap in the middle of them. These gaps allow a tab on the FlexPlate to extend into. And, once extended into the gap in the grooves the two parts are locked together.

The two tabs that lock the parts together can be withdrawn by pressing on the end of the FlexPlate. When the end of the FlexPlate is pressed it extends a rhombus-shaped spring. When the spring stretches out it withdraws the two tabs allowing the accessory to be removed from the FlexPlate.
Part Selection
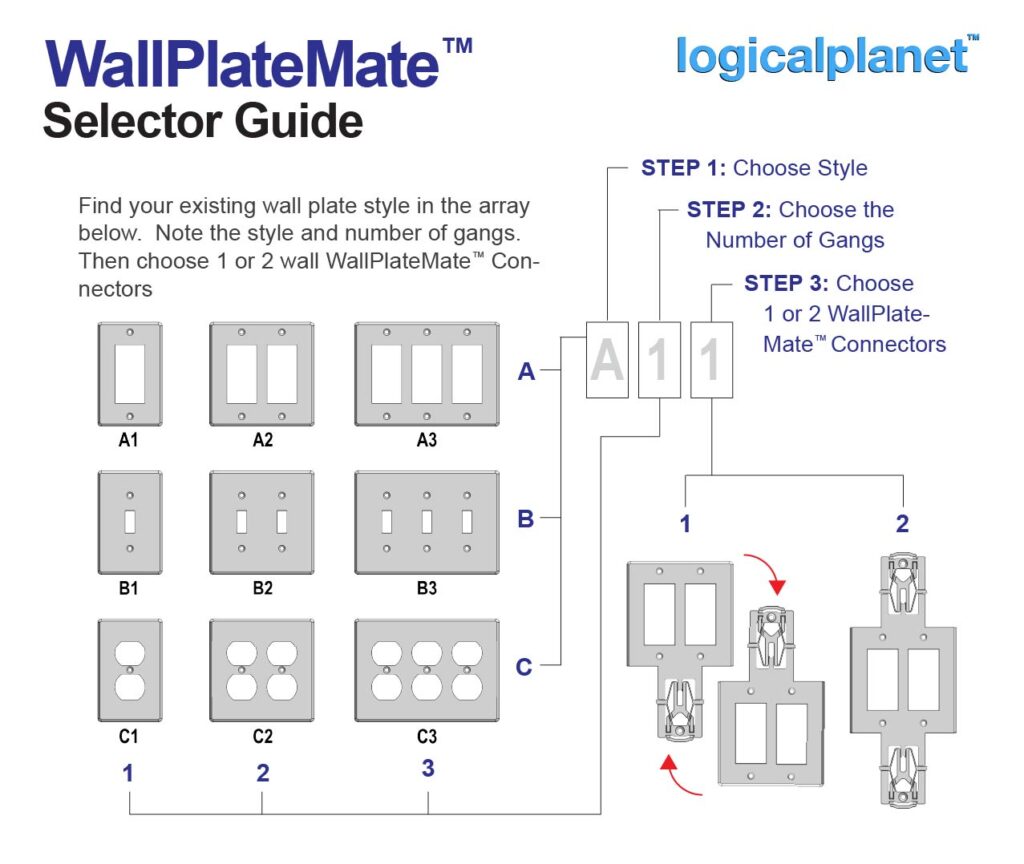
There are a lot of different wall plates and even more accessories so selecting the ones you want to print might be a little daunting. I have identified all parts with a 3-digit code. So look for the code and then match that with the code in each STL’s file name. To identify which parts you want to print check out the selector guide and accessory listings on wallplatemate.com.

Printing
I have tried to make my main print settings visible on the Cura screenshot but in case they are difficult to read I have summarized them again here…
Material: I choose to use PETG for its durability and flexibility.
IMPORTANT: As the wall plates of switch and electrical outlets are considered part of a flame enclosure it is important to use a flame retardant / self-extinguishing filament when printing parts to be used in electrical applications. There is a listing of some suitable filaments here and also here.
Print Orientation: As shown in the screenshot(s).
All WallPlateMates and the FlexPlate are designed to print face down on the build surface and require no support.

The Accessories all must be printed standing on the build plate and if support is needed it will be included in the design.

My Setup:
Nozzle = 0.4mm
My Settings:
Layer height = 0.2mm
Line width = 0.4mm
Wall count = 4 (1.6mm)
Infill = 40%
Support:
No support is required.
Assembly Notes
There is essentially no assembly required. Just install the WallPlateMate or FlexPate and snap on any Accessory.
Future
For sure I will be adding more Accessories to this system. They will be listed on the wallplatemate.com page.

Leave a Reply