The STLs for this design are free to download on thangs.com from July 19 to July 25.
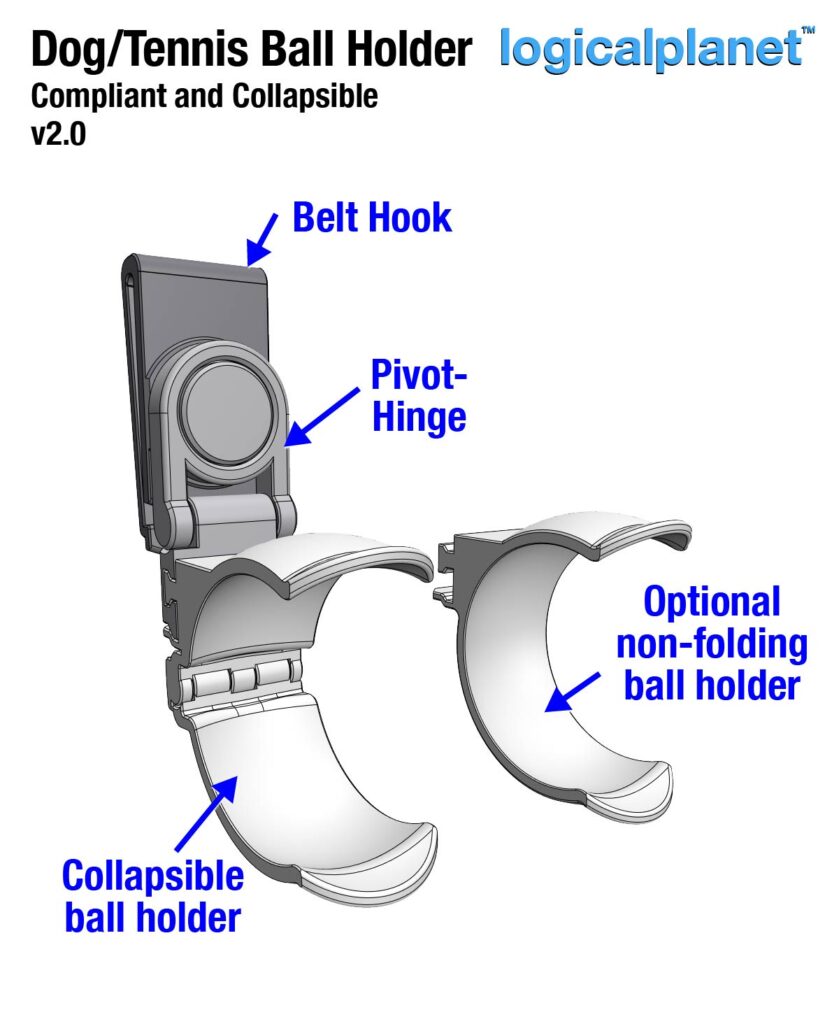
Three years ago I designed the first generation of this dog ball holder (fits a standard tennis ball too) and I felt it was time to revisit it based on the progress I have made in my designs. The original design was okay but very simple and the fact that it sat so close to the user’s waist meant it was not super comfortable and at risk of knocking the ball out. In fact, my biggest dog (Bob) quickly learned how to grab it off my waste. This new version is not only compliant due to the hinge and pivot incorporated into the design but it is folding so you can put it away when not needed. Being compliant it moves with you and adapts to the shape of your waste – and Bob can’t grab it as easily.

The 3-piece design incorporates my now pretty well-established belt/waist clip that then transitions to the pivot-hinge component. Those two components snap together and are not designed to be separated once connected.

The ball holder snaps into the pivot-hinge component and can be removed allowing an alternative holder to be snapped in. I may design other ball sizes in the future (based on demand) but for now, I have a non-folding design as well as the folding design in case it turns out the non-folding has advantages for any users.

There are several print-in-place hinge components included in the design. The parts can probably all be printed in any materials but I recommend PETG for this design.
Printing
I have tried to make my main print settings visible on the Cura screenshot but in case they are difficult to read I have summarized them again here…
Material: I choose to use PETG for its durability and flexibility.
My Setup:
Nozzle = 0.4mm
My Settings:
Layer height = 0.2mm
Line width = 0.4mm
Wall count = 4 (1.6mm)
Infill = 40%
Ironing = ON (recommended)
Support:
Designed to print without additional support. The belt clip has one piece of support included in the design.
Print Orientation: As shown in the screenshot(s).
Assembly Notes

All the parts press together as shown in the accompanying illustration.
I recommend a drop of synthetic oil into the pivot to keep it quiet and smooth. But it is not essential.

Leave a Reply