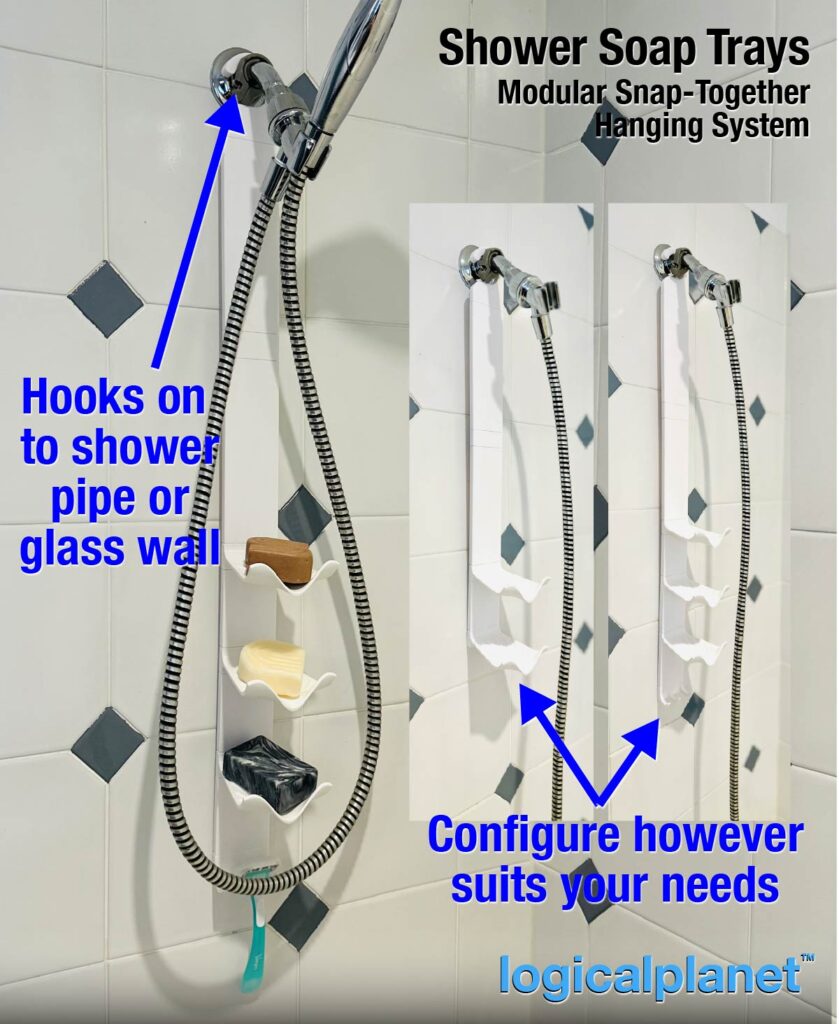
As you probably know, if my wife asks for something 3D printed, I make it happen. And, this is one of those things. A snap-together modular soap tray system for the shower. This is designed to hold multiple bars of soap and additional shower paraphernalia without using suction cups. Instead, I have made a top component to hook onto the glass wall of our shower and also a hook to hang on a faucet or tap.

Each of the accessory components of the system are female connectors and the spacers are male connectors. You can mix and match them however you want. One bar of soap and one razor hook or as many more as you like.


In our case, I wanted to hang this system flat against the glass of our shower so I created a simple “over-the-glass” hook which works well. But I know not everyone has simple glass walls so I have also made a hook for the shower head or faucet handles. If you need if for a different arrangement please let me know and I will do my best to accommodate.


I have included two sizes of spacers (75mm and 175mm in height). These allow you to hang the system from a relatively high point in the shower and also to separate the accessory components so it is comfortable to use. Typically you would want to put the 75mm spacer between any accessory components other than from the top.

Printing
I have tried to make my main print settings visible on the Cura screenshot but in case they are difficult to read I have summarized them again here…
Material: I choose to use PETG for its durability and flexibility. Also, it is good for using in wet environments.
My Setup:
Nozzle = 0.4mm
My Settings:
Layer height = 0.2mm
Line width = 0.4mm
Wall count = 4 (1.6mm)
Infill = 40%

Support:
Designed to print without additional support. I have included print support in the design of the connectors. And, also the razor hook component as shown in the accompanying illustration.

Print Orientation: As shown in the screenshot(s).
Assembly Notes
No assembly or post-print processing is required. Once the print support is removed, simply press the mating parts together. To separate them, squeeze the back side as shown in the accompanying illustration to unlock the parts and pull them apart.


Leave a Reply