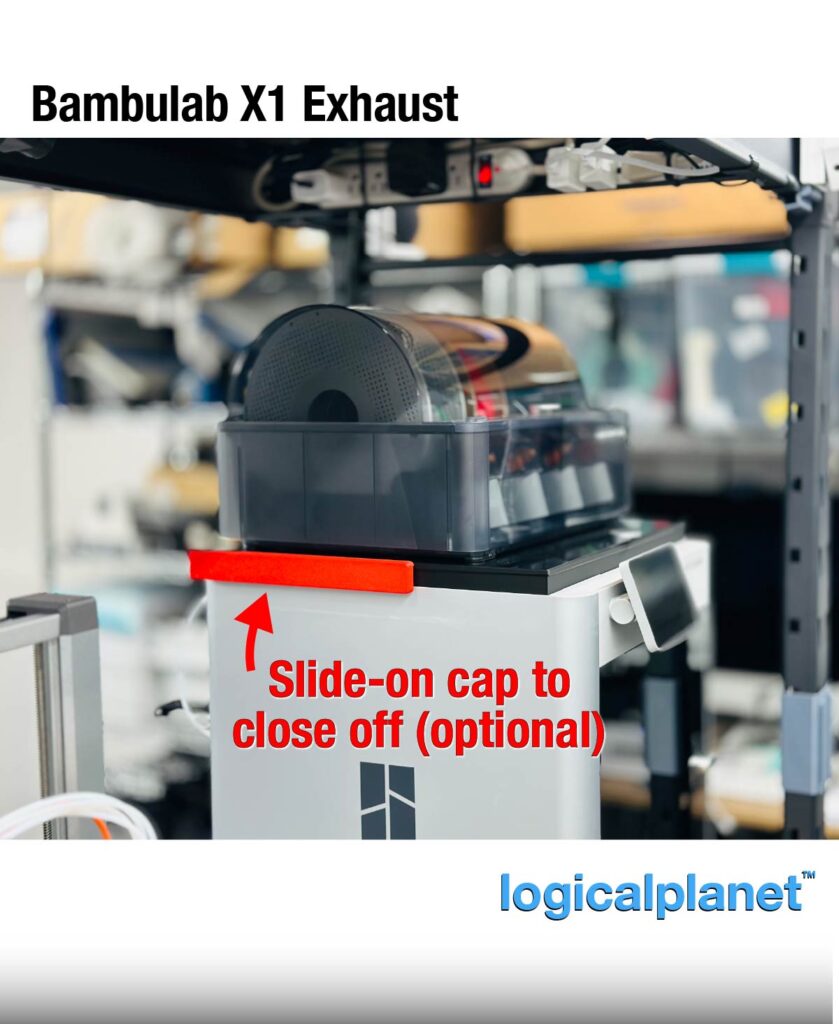
If you have an X1 and want to extract air from the chamber here is a solution that you may be interested in. Rather than try to ride over the existing vent openings on the back of the machine, I have created a frame that sits on top of the machine (under the glass). It effectively lifts the glass up 20mm to create space for an exhaust port.
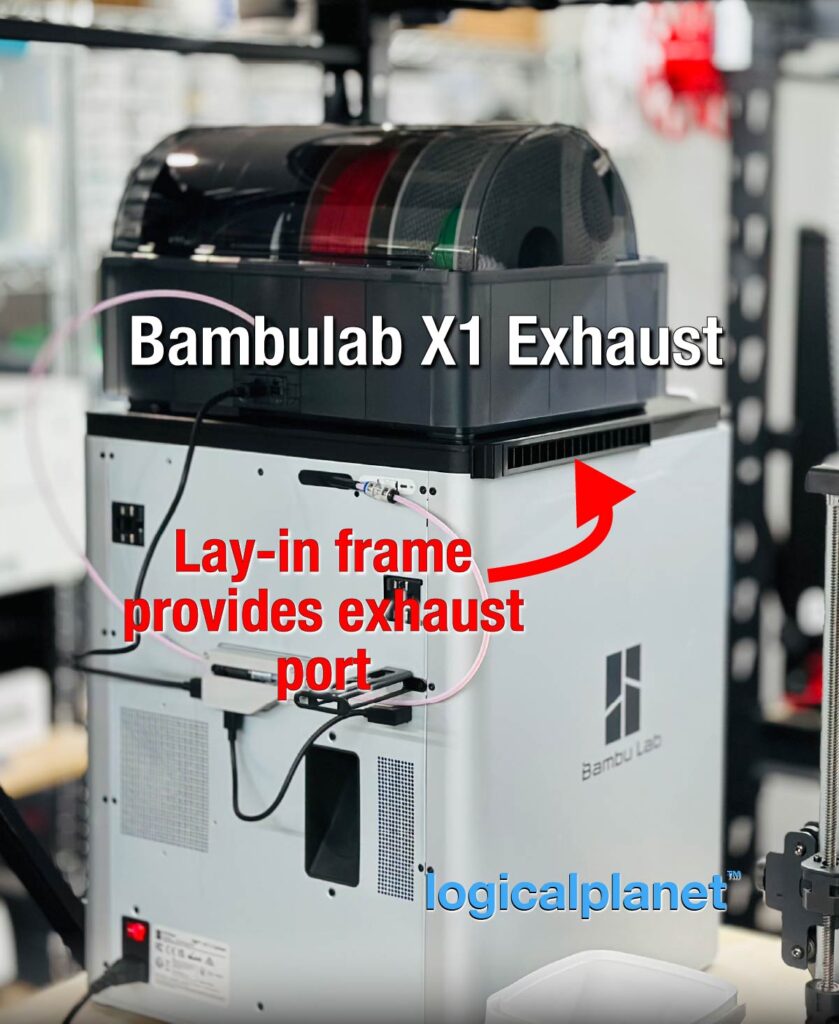
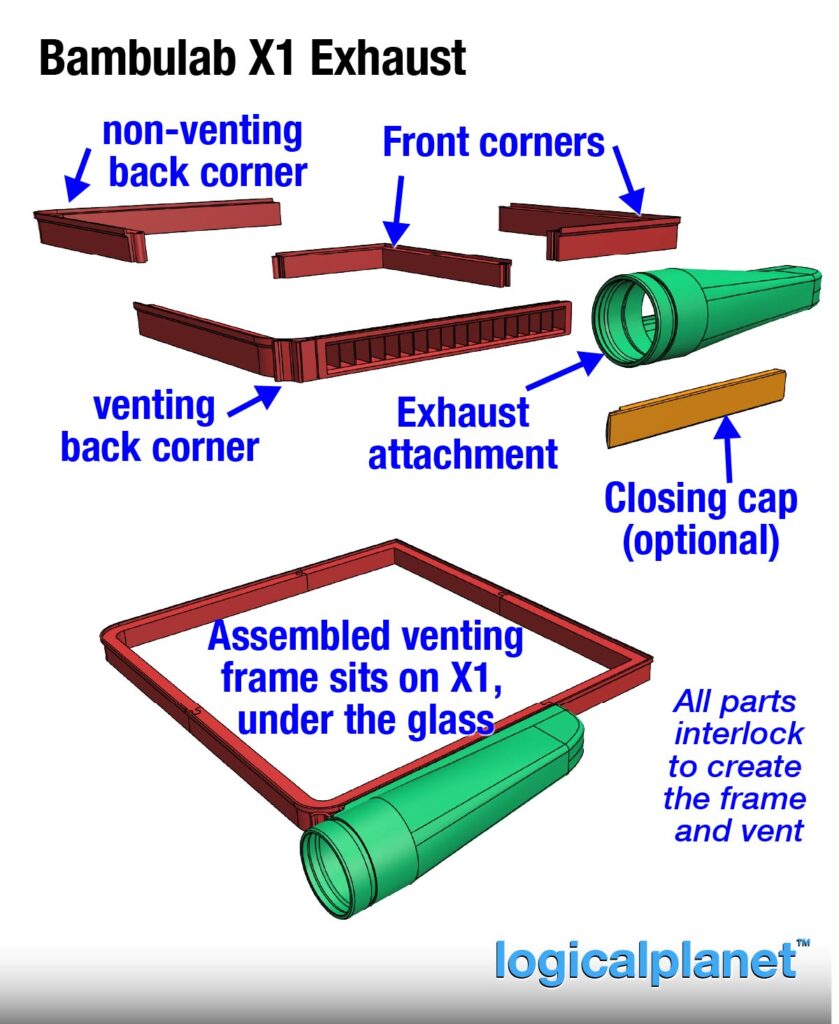
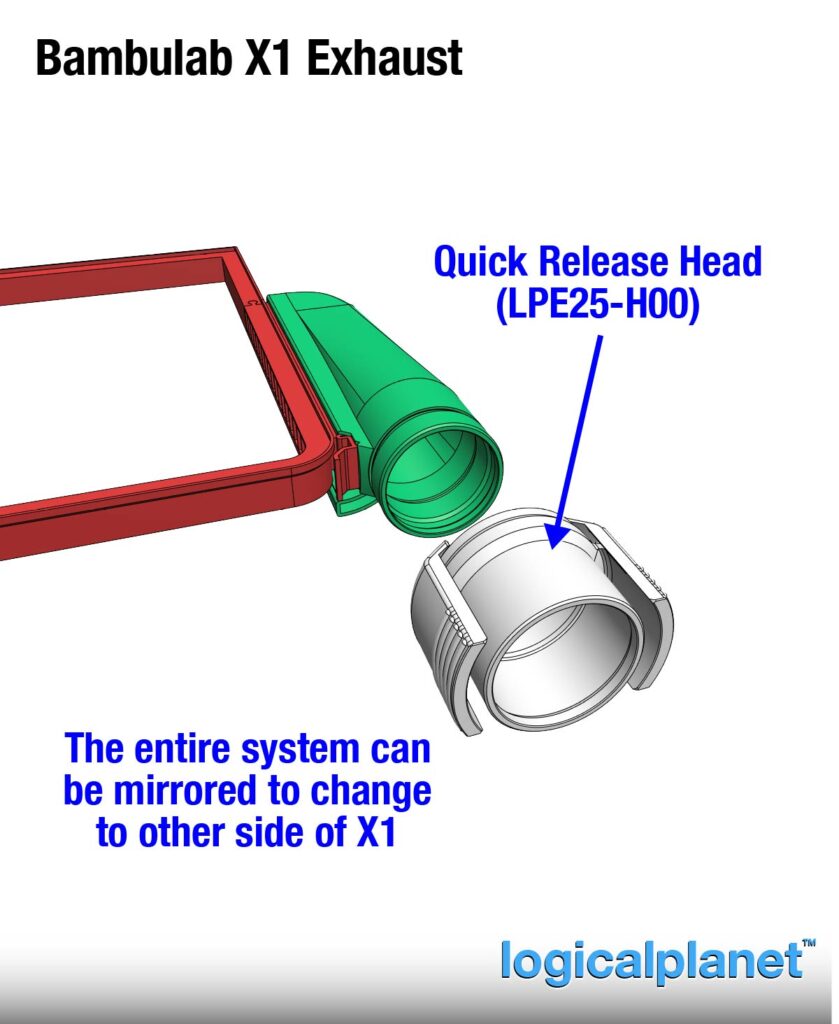
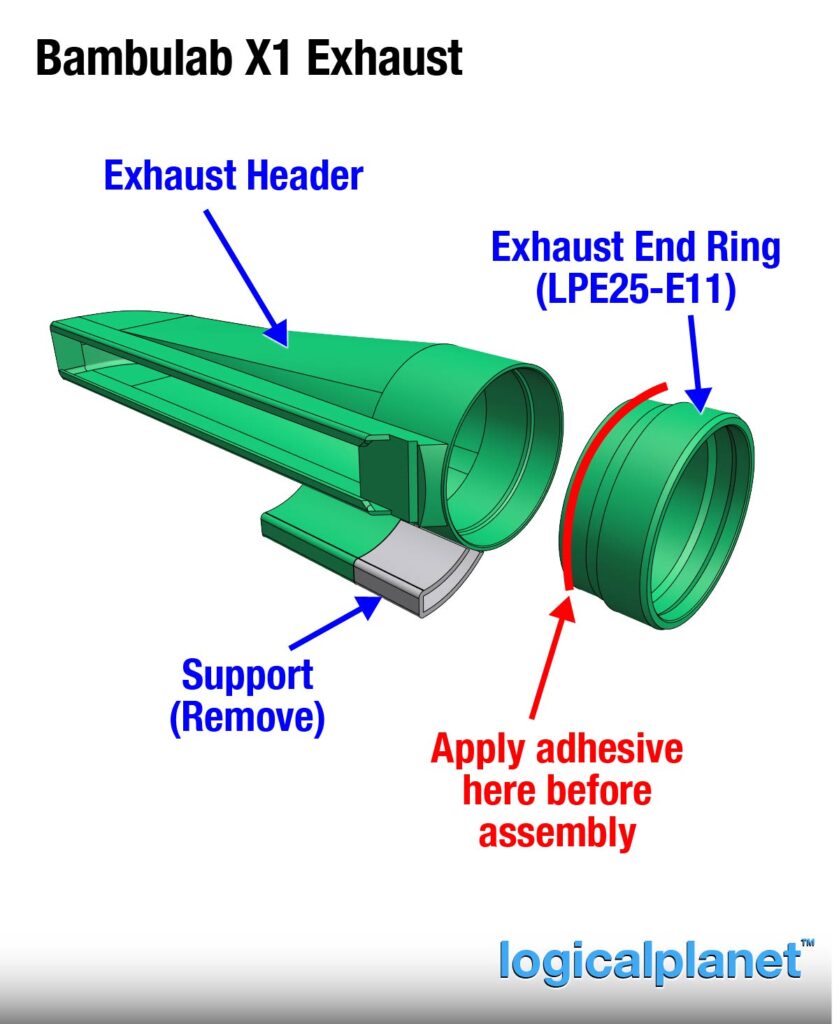
With the frame laid onto the machine, you can then attach (slide-on) the Exhaust Header which can then be connected to an exhaust hose. In my case, I am using my quick connect head so that I can easily remove the exhaust hose at any time.
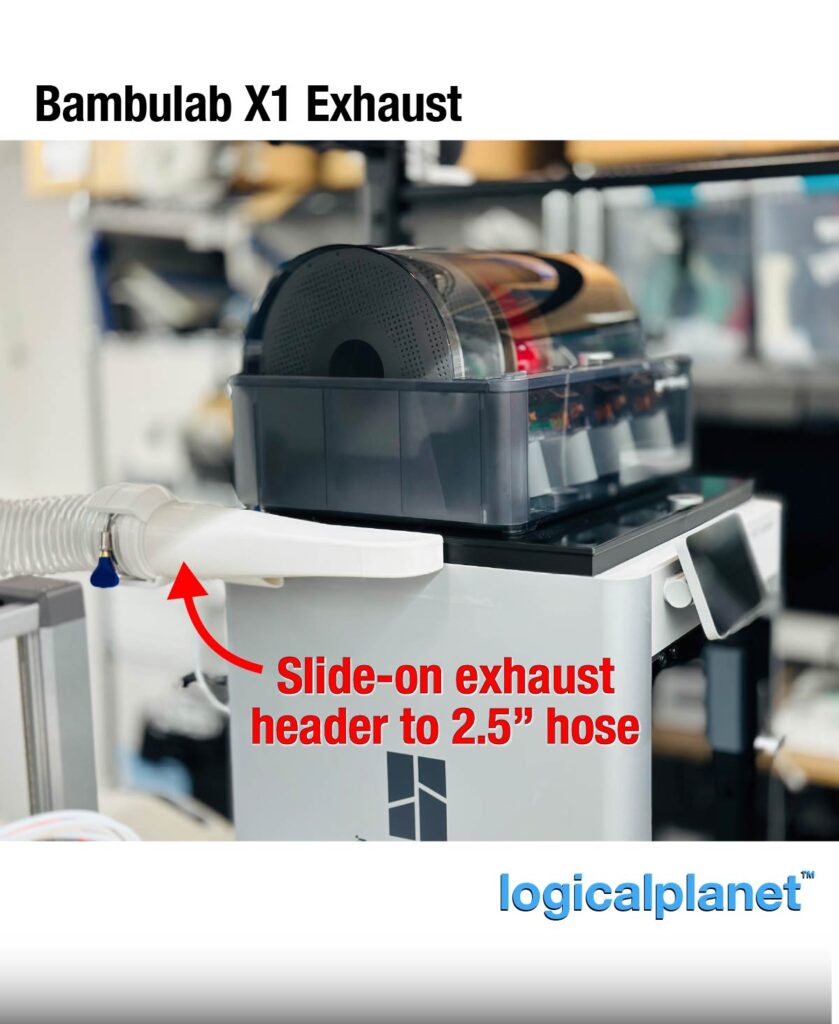
But even if the hose is attached by a pipe clamp you can still slide off the Exhaust Header and replace it with a cap to close off the exhaust port. The exhaust header is released by a quick release on the back corner of the frame. Or at any time, you can remove the entire frame from the top of the machine to return it to the original configuration.
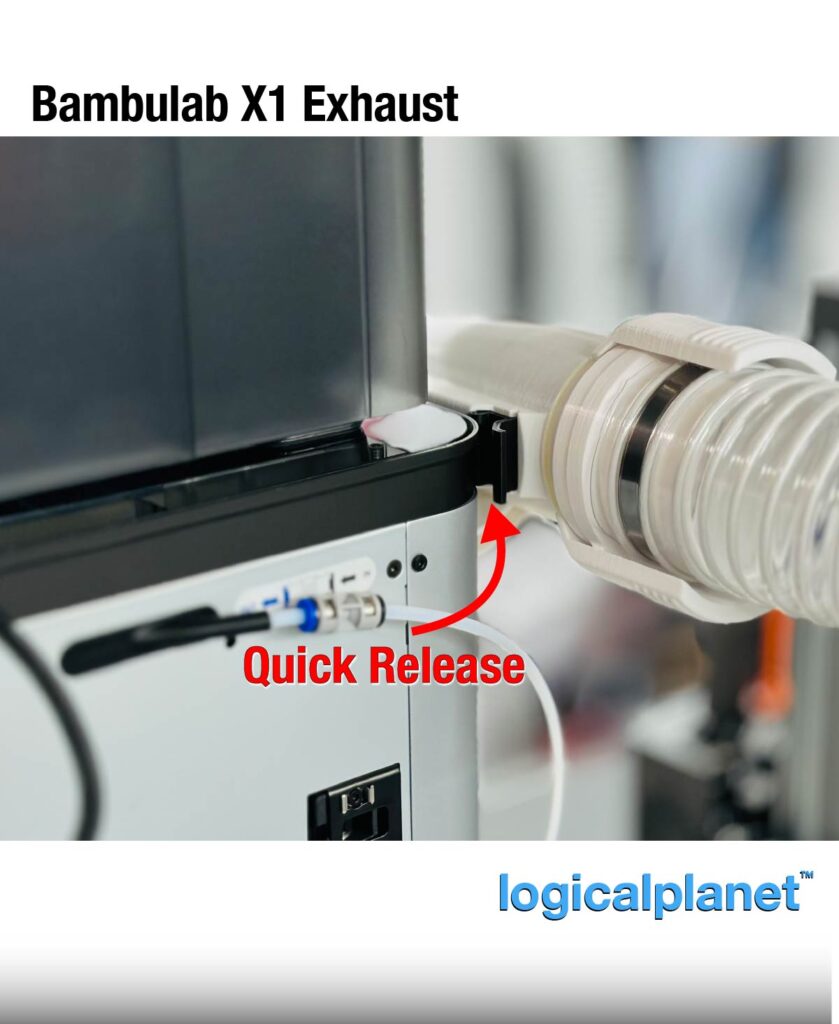
The slide-on cap to close off the exhaust port also locks into place and can be quickly removed by releasing the quick release at the back corner.
The Quick Release Head is part of an entire system of exhaust parts that you may want to be aware of. Please check it out here…
https://www.logicalplanet.com/2024/02/11/quick-connect-exhaust
Also, I have a Variable Flow Valve that you can also incorporate into the system which is described here…
https://www.logicalplanet.com/2024/03/05/variable_flow_valve
Printing
I have tried to make my main print settings visible on the slicer screenshot but in case they are difficult to read I have summarized them again here…
Material: I chose to use PETG for the exhaust header and other exhaust parts. I used PLA for the exhaust frame.
My Setup:
Nozzle = 0.4mm
My Settings:
Layer height = 0.2mm
Line width = 0.4mm
Wall count = 4 (1.6mm)
Infill = 40%
Ironing = ON
Support:
Designed to print without additional support.
Print Orientation: As shown in the screenshot(s).


Assembly Notes
Once printed, the frame simply rests on the top of the X1 (and under the glass). It can be removed at any time.
The Exhaust Header is printed as 2 pieces which need to be glued together prior to use. Once glued, you can attach a 2.5″ exhaust hose using a pipe clamp or use my quick-release head. Refer to this post for more details on that https://www.logicalplanet.com/2024/02/11/quick-connect-exhaust/.

Leave a Reply