This one is so much fun… give someone a present they can’t open until you give them the code. This gift box has an integrated lock system with a 4-dial combination, each dial offering numbers from 0 to 9. Which means there are 10,000 possible combinations. You can secure your gift and share the passcode at the perfect moment—whether it’s on Christmas morning, a birthday, or another special occasion.
No more sneaky peeks into presents before the big day! This gift box is as practical as it is fun, adding an extra layer of anticipation to gift-giving.

The entire lock system is incorporated into the lid of the gift box. The four outside “ribbons” on the top of the box are each a lock dial. You use those to the combination code which opens the box. Since there are 10,000 possible combinations you need to know it to open it. Then once the correct code is entered via those ribbons, the central ribbon can be turned to release the lid from the gift box body.
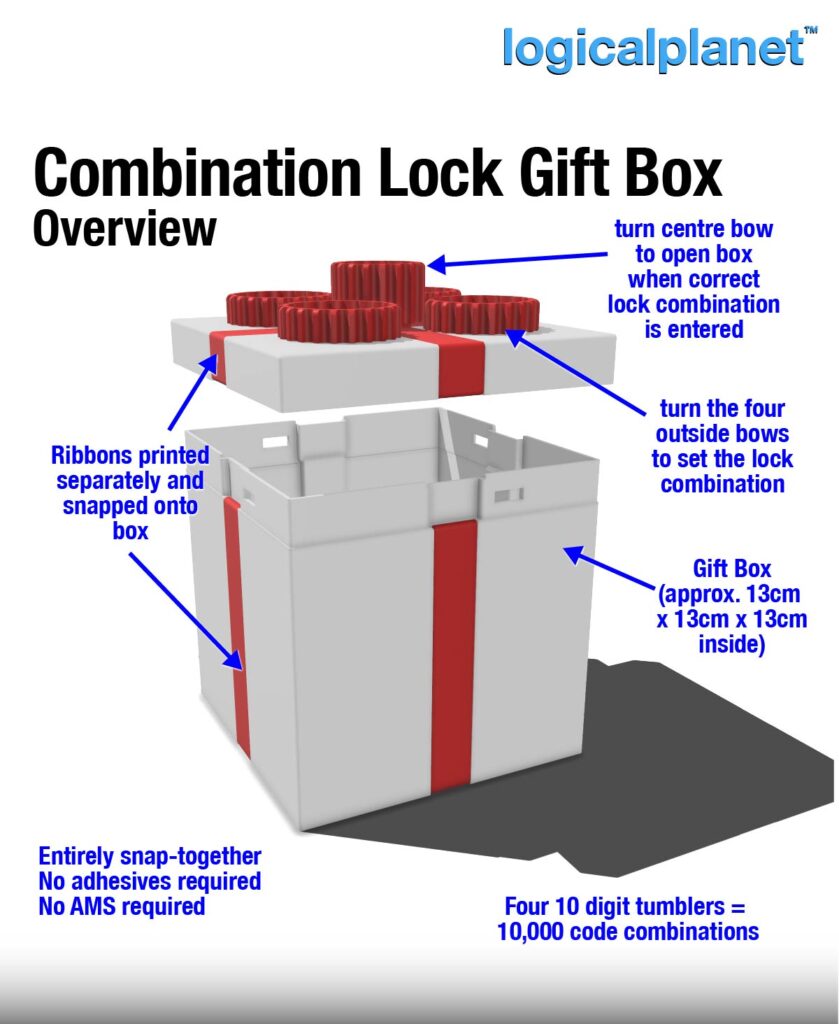
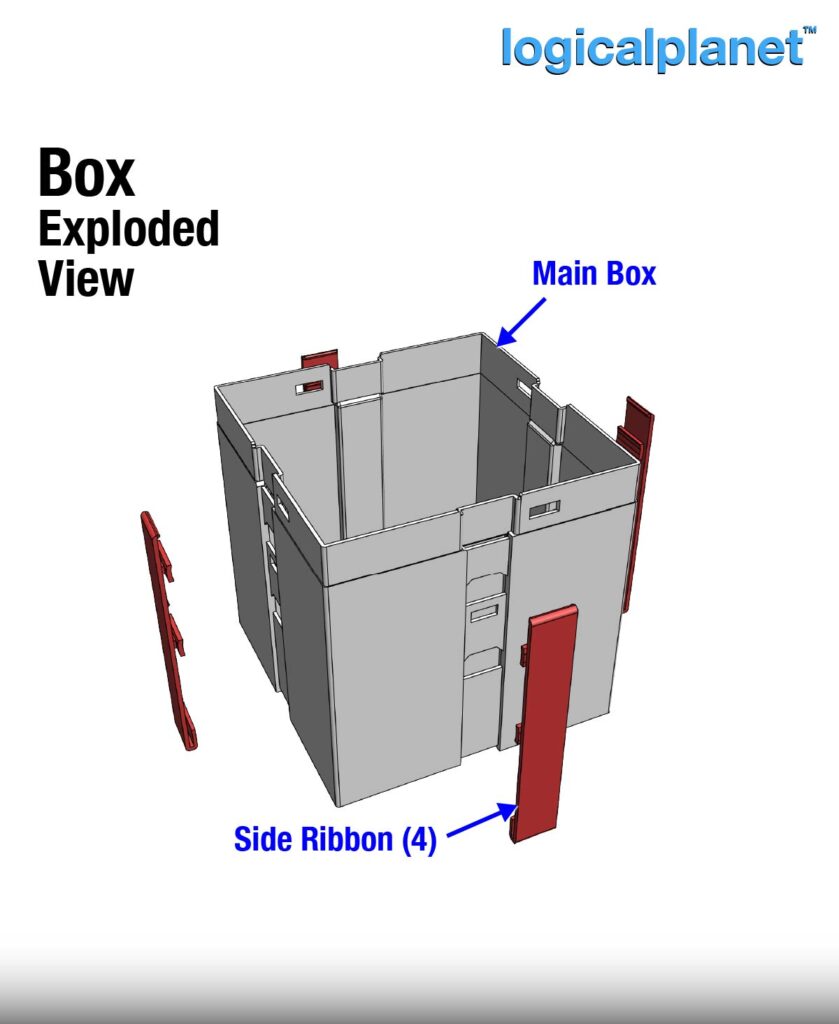
The main box of the gift box is quite simple and only has the snap-on ribbons to complement the box. At the top lip of the box are rectangular holes which receive the lock latches from the lid.
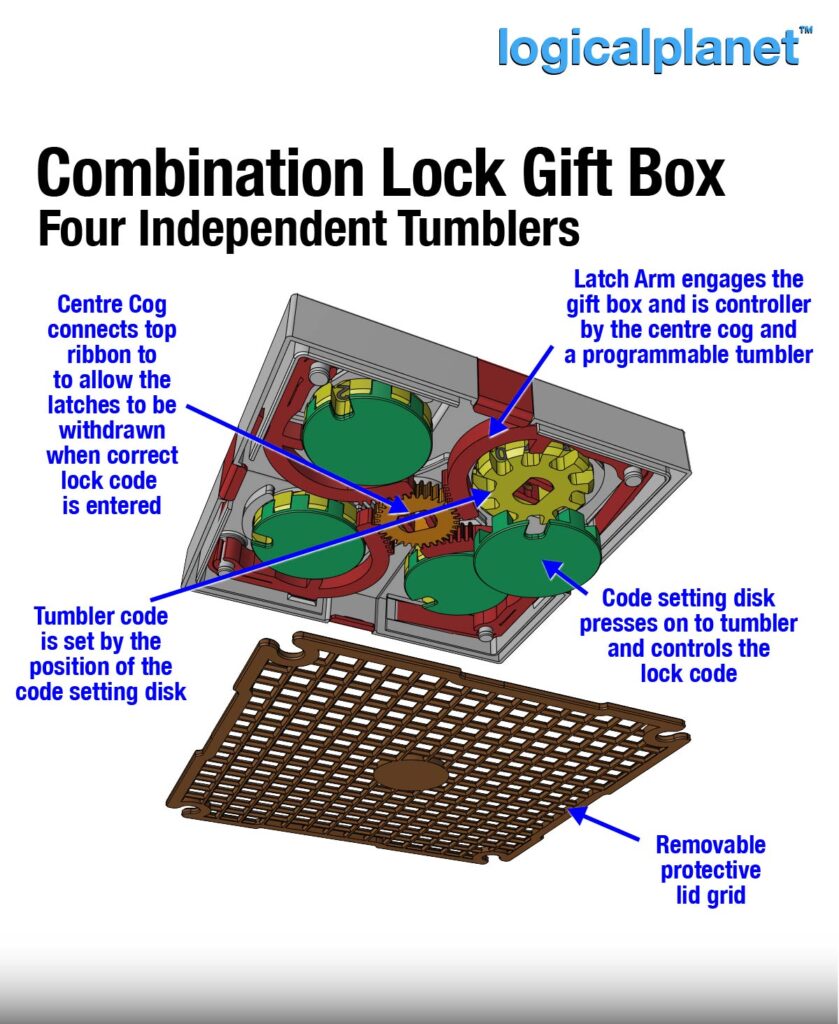
Everything is printed and no hardware or fasteners are required. You can change the lock combination anytime and over and over again.
The inside of the gift box is approximately 13cm (5″) cubed.
If you want to understand how it works or assemble one, please check out my video linked at the top.
Printing
Functional designs (such as this one) generally require more strength than non-functional designs and more strength than the typical default slicer settings provide, so please review your slicer settings carefully.
This product was designed for a 0.4mm nozzle, a 0.2mm layer height and the following settings:
- Wall Line Count = 4 ( 4 x 0.4mm = 1.6mm walls )
- Top and Bottom Layer Count = 5 ( 5 x 0.2mm = 1.0mm top and bottom )
- Infill = 40%, Cubic
- Detech Thin Walls = ON
- Ironing = OFF (not needed)
- Support = All required support is designed into this product
- Brim = NO (a brim can complicate details of print-in-place parts and parts printed close together – If you have to use a brim, set it to “outside only”)
- MATERIAL: PLA or PETG (any material should work fine)
- PRINT ORIENTATION: As per the STL files
Assembly Notes
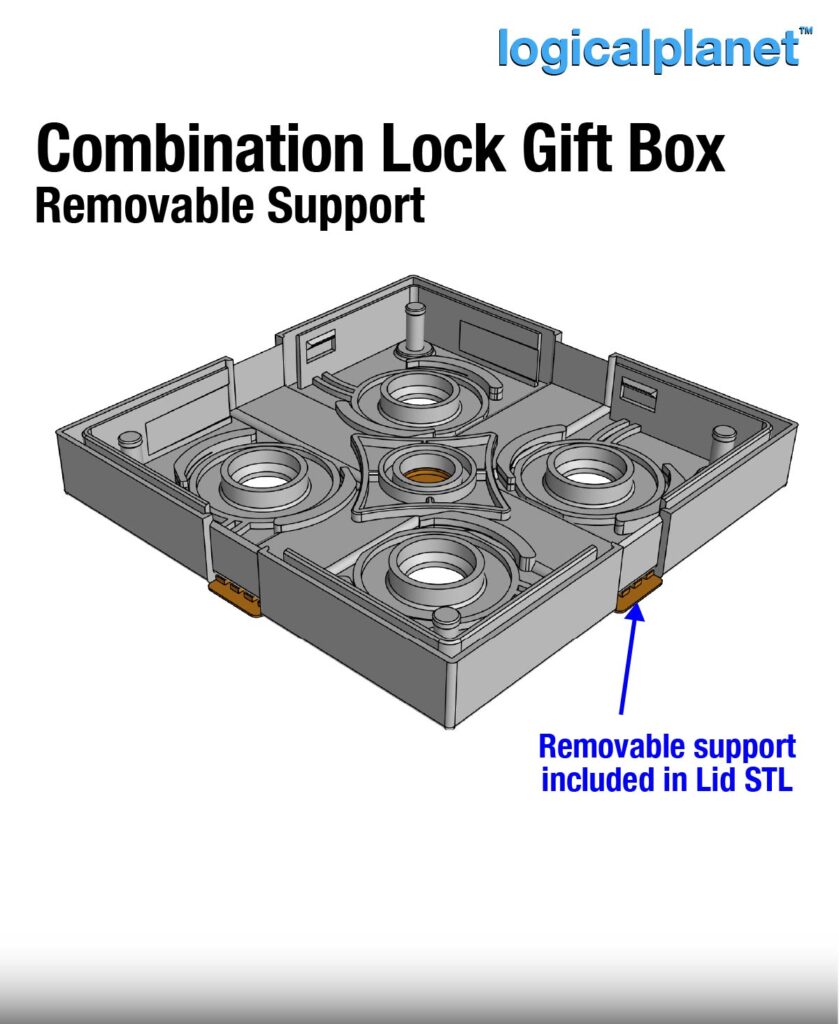
There is a large piece of support incorporated into the Lid design. Please remove that after printing. This support requires that “Detect Thin Walls” is enabled in your slicer.
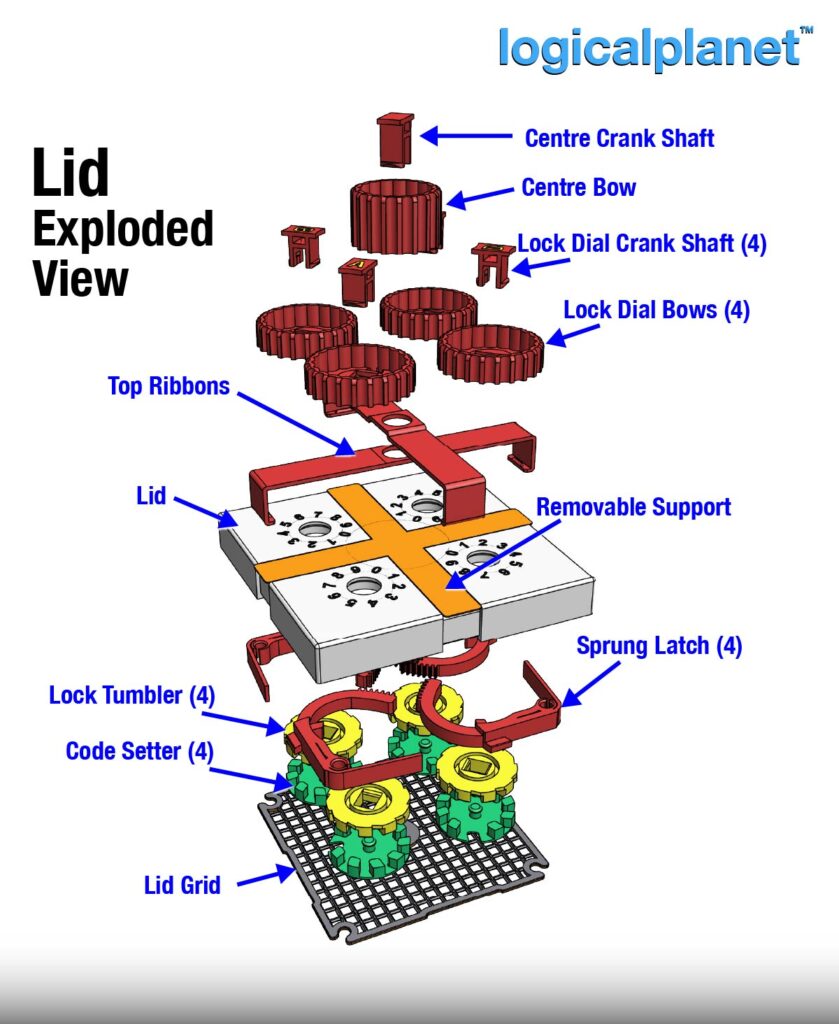
Once all the parts are printed I strongly recommend you view my video for assembly instructions.

Leave a Reply