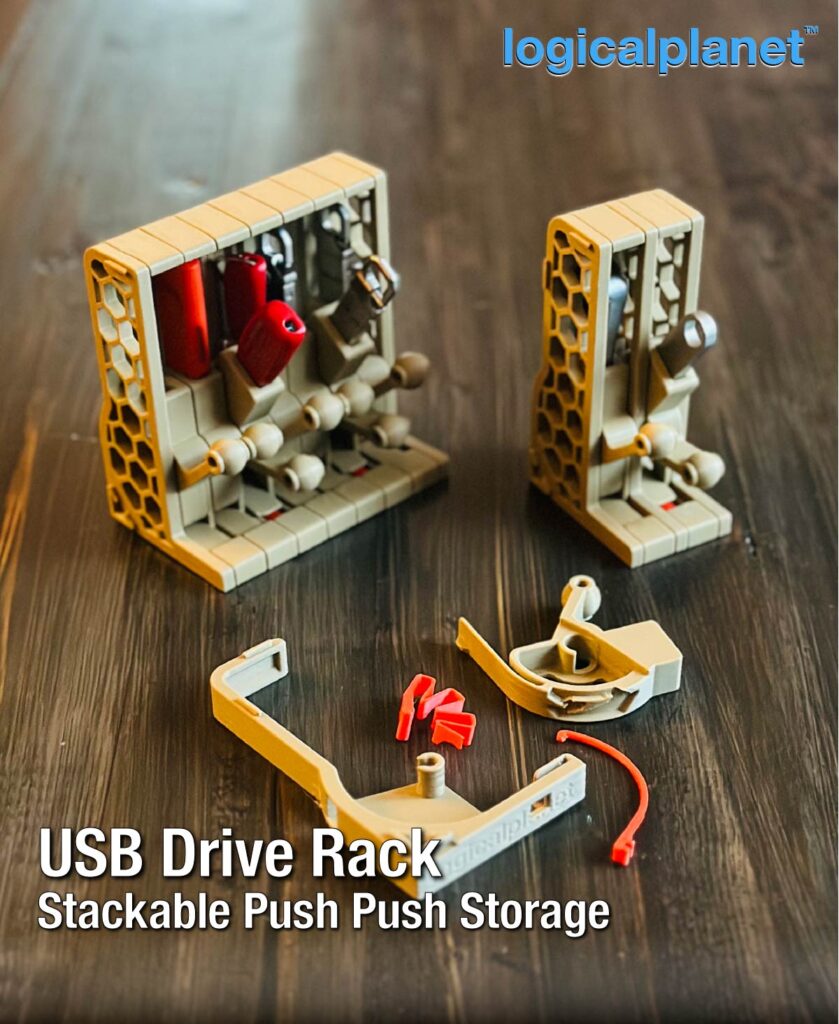
I don’t know if it is just me or not but I have a lot of USB Drives but can’t seem to find one when I need them, so I decided to make a rack for them. But I did not want to make “just another rack”. I wanted to make a rack that had some character. I also really like the idea of a push-push mechanism so I decided to combine the two and here is the result. A push-to-open, USB drive rack, that is scalable, snap-together, and can be configured with or without walls.

It was a lot more difficult for me than I had anticipated and I learned or perhaps should say relearned a few lessons in design. I will explain those below. But the end result is quite good and surprisingly successful in PLA (which is not a flexible material).

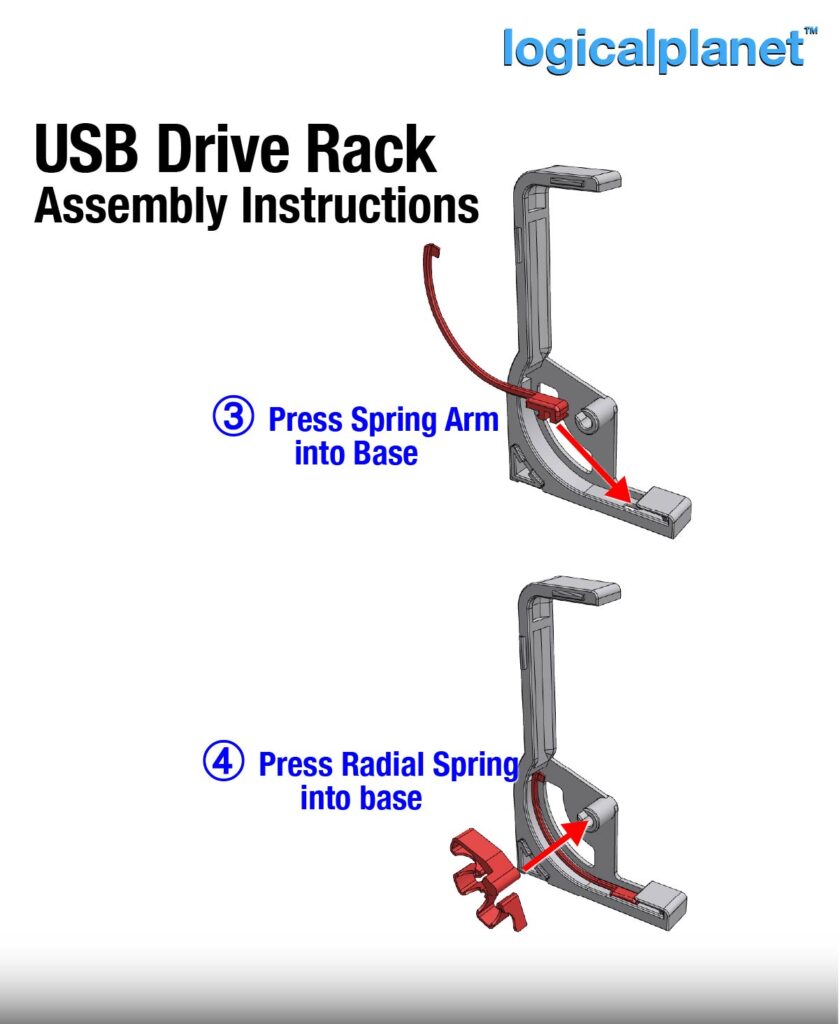
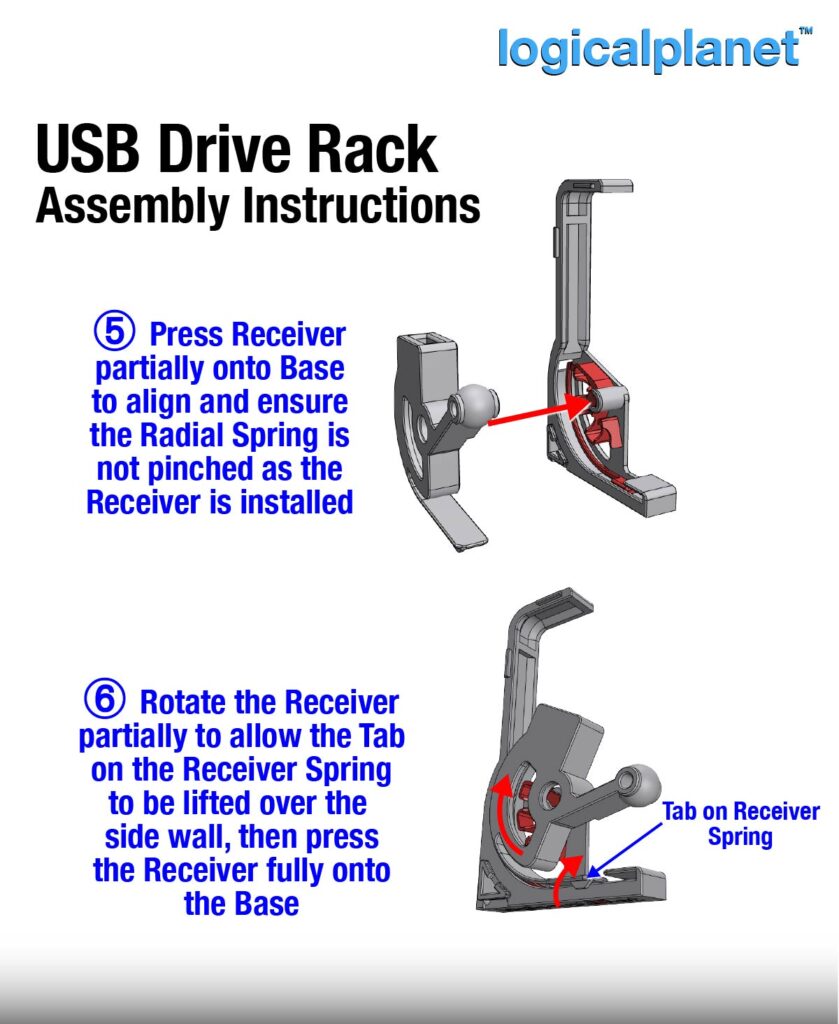
The success of the design is that I used a two-stage spring strategy to ensure the Receiver rotates back to home when allowed. The total rotation of the Receiver is 60 degrees and with just one single PLA spring I could not get enough flexibility and memory in the material to work. So I used 2 springs. The first spring is the long flap incorporated into the Receiver and flexes against the Base as the Receiver rotates. The second spring is a Radial Spring that is installed inside the Receiver to provide the “kick” in the last 30 degrees of rotation.

Since the rack is not a continuous-use application (as long as you do not leave the Receiver titled forward for too long) the springs largely restore when the rack is not being used.
The push-push (aka push-to-open) mechanism is also relatively unique since it is in a radial format. Most examples I could find when researching this are linear. And rotating added quite a bit of complexity to the design (from my perspective).

Each rack element can be snapped together with other ones and a wall to create endless configurations. Use just end walls to create the most compact arrangement. Or end walls and in-between walls for the most useable arrangement.
Lessons Learned
I spent way more time perfecting this than I planned and expected. So I tried to take some shortcuts. In fact, this was originally a 2 part design – just the Base and the Receiver. The Radial Spring and the Spring Arm were incorporated into the Base. But both of those parts took a lot of trial and error and that meant a lot of printing and re-printing (delaying the iterative process). After a few weeks I thought to separate the parts and that allowed me to accelerate the design process substantially. It was a good reminder that separating parts and printing them separately can be an important design strategy even though we often want to minimize the number of parts to reduce assembly time post-printing. Now that I have resolved all the design issues I could combine them into one part again but I really like colour contrast and also it will allow faster replacement of parts if needed in the future.
I also learned (again) about many of the clearances needed for different functionality for different applications. Print orientation, material, function and tolerances all come into play and it really bothers me that I have not kept a good and comprehensive journal so that I do not need to re-learn those clearances every time I design something. So I am starting my journal now and will try to be very disciplined to make records so that I can refer to it in the future to save time.
Printing
Functional designs (such as this one) generally require more strength than non-functional designs and more strength than the typical default slicer settings provide, so please review your slicer settings carefully.
This product was designed for a 0.4mm nozzle, a 0.2mm layer height and the following settings:
- Wall Line Count = 4 ( 4 x 0.4mm = 1.6mm walls )
- Top and Bottom Layer Count = 5 ( 5 x 0.2mm = 1.0mm top and bottom )
- Infill = 40%, Cubic
- Support = All required support is designed into this product
- MATERIAL: PLA
- PRINT ORIENTATION: As per the STL/3MF files
Assembly Notes
Once printed, remove the print support as indicated. And then following the illustrated instructions. Please note that a light coat of synthetic lubricant on a few points on the Reciever will significantly improve the operation.


Leave a Reply