
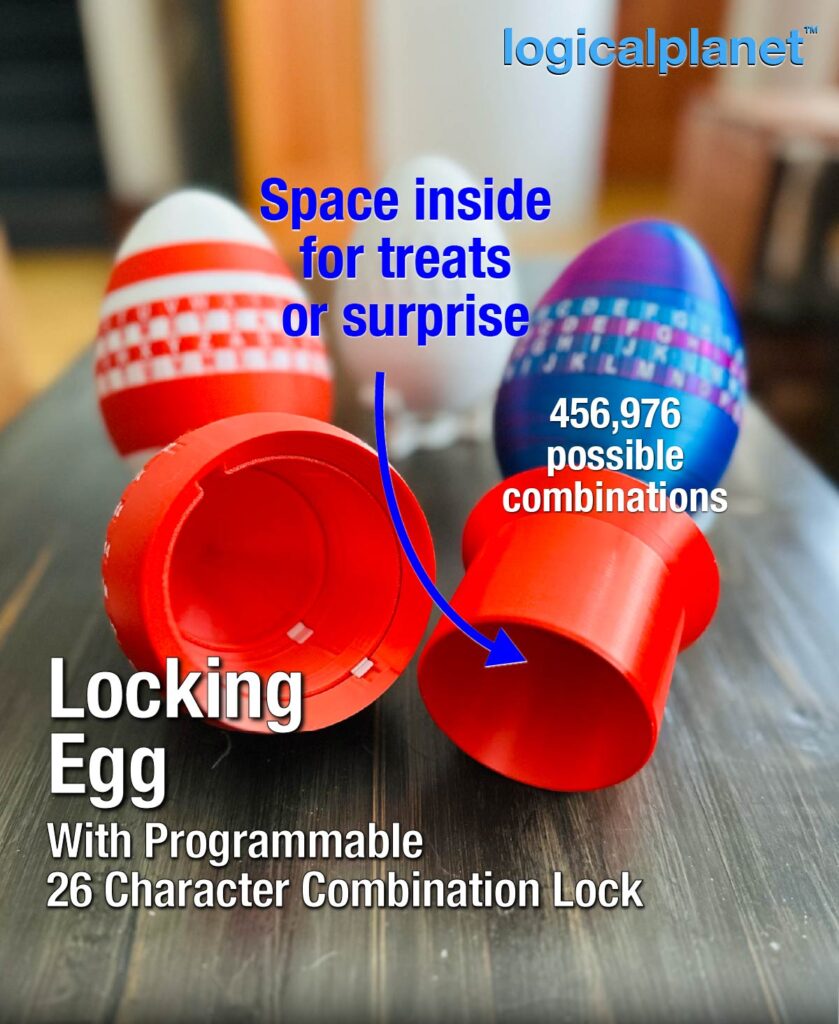
I have very happy memories of Easter egg hunts as a child, and that makes me want to help contribute somehow to the Easter hunt tradition for those who do it. My parents had us hunt around for clues, with each clue leading to another clue and so on until we found a prize at the end of the hunt. I can’t really improve on that, but I thought a large lockable egg could be fun and incorporated somehow into the event. This egg features a programmable combination lock. You can set each of the 4 lock dials to any letter in the alphabet (a-z), giving it a whopping 456,000 possible combinations.

Once the correct combination code is dialed in, you can pull the egg apart and reveal the compartment inside, which could contain a treat or surprise.
You can print the egg with or without an AMS unit. Without the AMS, you will only have embossed letters on those dials, but that is the only compromise.

I have created two versions of the egg. One version has two extra layers in it, so if you want a more colorful egg, you can print more layers in different colors. But if you prefer to print it in fewer parts, you have that option too.
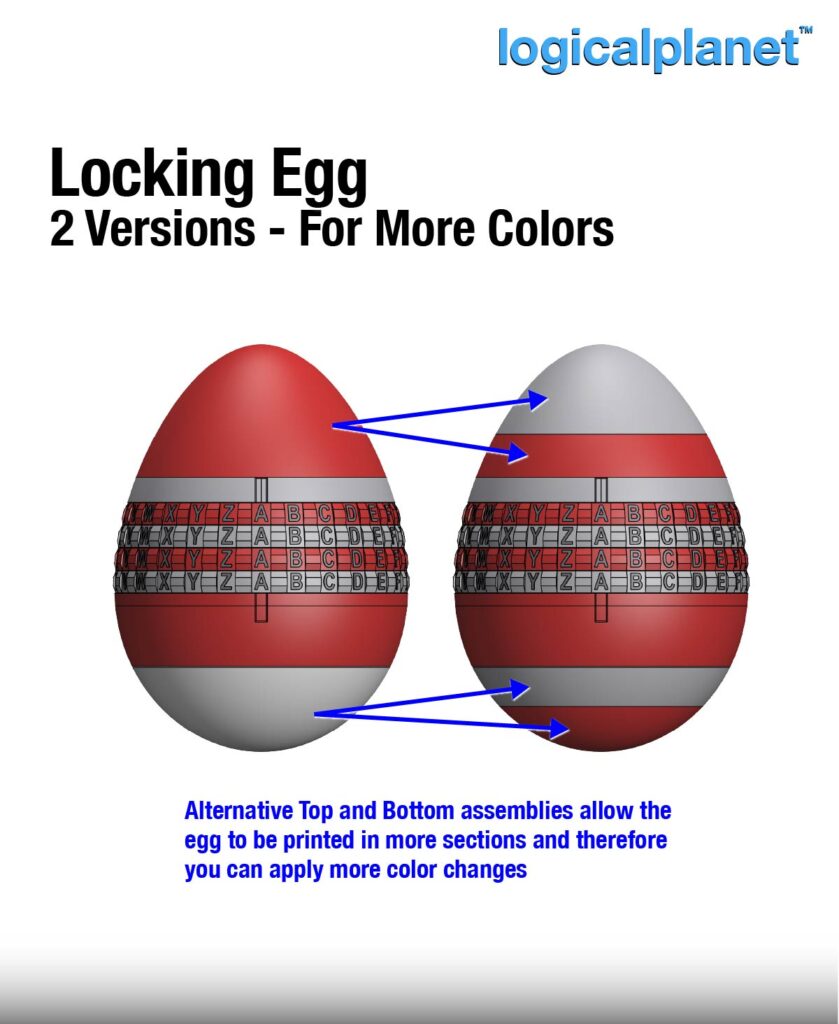
Where the bodies are threaded together, I used a simple press-into-place thread lock that keeps the parts together but allows them to be separated when the correct code is entered. This allows you to change parts (for varying color combinations) if desired.

Print Settings
Functional designs (such as this one) generally require more strength than non-functional designs and more strength than the typical default slicer settings provide, so please review your slicer settings carefully.
This product was designed for a 0.4mm nozzle, a 0.2mm layer height. For best results, I suggest the following:
- Material = PLA
- Nozzle = 0.4mm
- Layer Height = 0.2mm
- Line Width = 0.4mm
- Wall Count = 4 (1.6mm)
- Top and Bottom Layer Count = 5
- Detect Thin Walls = ON
- Wall Generator = Arachne
- Infill = 40% (Cubic)
- Raft = You can use a raft (I suggest 3 layers) if you have difficulting printing the two main body parts (104 (alt 102) and 304 (alt 301) if needed) which have only a small amount of contact with the print surface.
- Support = None required.
- Print orientation = As per the STL/3MF files and the included image
Assembly Notes


Leave a Reply