[ This is work in progress. ]
This is really about what I learned building AND operating six Voron SO FAR. And, I am writing this for people who haven’t built a Voron2 yet. I hope this will be helpful and supplement all the other information out there.
It has been so far a continuous learning process and I guess that will go on for some time. But here is what I have taken away from it so far…
[ Please note I started with this basic configuration… Voron2 v2.4r2, RPi 4B, BTT Octopus V1.1 MCU, Mainsail, klipper, initial build from a kit (same as or similar to Formbot purchased through Canadian reseller) ]
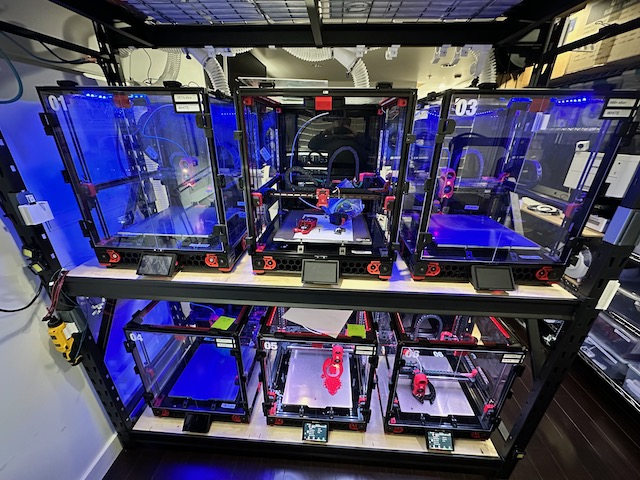
I started my first Voron in November 2022 and at that time I thought… I got this, I so got this!! Wow was I surprised how much more time and energy went into it than I had expected? I read that I should expect it to take about 40 hours. And, I assumed I would do it faster than that. I didn’t. Not only did I spend way more time than that (especially if you factor in all the learning time), but also, I was way more challenged and frustrated than I had anticipated.
However, I was super impressed with the Voron design and the finished product. I already had two other low-cost printers and knew I needed to have 2 printers at all times so that if one was not working I still had another one. Of course, once I used the new Voron2 r2.4 I was hard-pressed to use my older printers. So I ordered another kit so that I could build a second one. I thought for sure the second one would be way faster to build. But it wasn’t. It was quicker indeed but I am sure I still took about 40 hours or more to get it complete and running.
Once I had two built I was so in love with them that I decided I wanted to build a rack of them and explore small-scale production of products I designed, produced and sold on Amazon. So I figured with a heavy-duty rack from Home Depot I could organize 6 printers. And, that is what I did. In October of 2023, I had them all up and running and organized.
When I built units #3 and #4, I documented my time building them and for sure I was a little quicker again. I built them in parallel and I think in the end I was finished building the two in about 60 hours (meaning around 30 hours each). But here is the first thing I learned (in the general order that I learned them)…
Faster is not better. I knew it wasn’t but I could not help myself. I made several wiring errors (amongst other errors) that were just stupid. My mind was not focused and I probably was thinking a step ahead instead of focusing on what I was doing. Of course, you do not know you have made the error until later. As a result, a lot of time was lost later troubleshooting and diagnosing silly mistakes. The takeaway from this is… take your time! Double-check your work.
In the last year of operating Vorons, the list of issues I have had is extensive. But the number of them that trace back to my errors and build quality is probably close to 100%. There are likely a few exceptions but my point is almost all the issues I have had were errors or my lack of knowledge and experience.
When I built units #5 and #6 (also in parallel) I took more time and slowed the process down. Finally, I produced machines with fewer mistakes and a better build. Super tight repeatability and greater gratification.
The first two (I refer to as #1 (V01) and #2 (V02)) were CW1 and Afterburner. All my machines are Voron2 v2.4r2 350mm units. Once I had them built I converted them both to CW2 and StealthBurner tool heads. I did that to allow the switch to Tap.
It is worth noting here that I was helping my brother build his first Voron as I was building my #3 and #4. During that time we were frequently referencing the Voron manuals. After some unsuccessful communications between us, we came to the realization that there are many versions of the manuals out there and we both had different ones. AND, neither of us was using the latest version. So make sure you for to the Voron site and get the latest version before you start.
Make sure you have the most recent manual… Voron2 v2.4r2 Site
Pre-heat the chamber. I learnt this more recently, but you will save a lot of headaches if you pay attention to this one…
There was a time that I thought, the printer prints so well without preheating why pre-heat? I wanted to print as fast as possible and a 5 or 10-minute pre-heat was just in the way! All along the way, I had some trouble here and there with bed adhesion and first-layer thicknesses. But I thought I just needed to get the z-axis offset tuned better. I was half right… it is the chamber heating (or more specifically heat swell). I now preheat for 15 to 20 minutes (especially when printing ABS) and first-layer consistency and bed adhesion are infinitely better. The heat swell issue is well documented, so make sure you find a solution for it. In my case, I heat the chamber before setting the z-axis offset and then heat the chamber before printing.
For sure a future upgrade for me will be some form of heat swell compensation, most likely titanium backers. But I just haven’t gotten there yet. I really like the software approach to heat swell compensation as well but I haven’t dug into it enough yet.
2024-03-31 Update: I have installed titanium backers now in the machines. Will see how that impacts this subject over time.
Please note, this issues connects closely to the next one…
Part Cooling Fan On during pre-heat. I had a lot of trouble with heat creep in the hot end when the printers were warming up. In a few cases, I had the tap mount distort from heat. There is a lot of information out there about this but what you really need to know is… turn on your part cooling fan (PCF) while the printer is sitting idle with the hot end on. Turning on the PCF quite simply brings a little more air movement in and around the hot end and reduces the risk of heat saturating up into the structure (aka Heat Creep).
Remember to turn it off in your print start macro before the print starts so that your slicer settings can take effect.
Tap is awesome. I feel like the jury was still out on Tap when I made the switch but I can tell you it is fantastic if you are still using a Z end stop and the Omron contactless probe – stop using it immediately and switch. If you are using a clicky probe or equivalent then you might not appreciate Tap as much. But if you are using a Z end stop you definitely will.
Get the Tap manual… Voron Tap Site
So tap is something to factor into your build early on. Most kits are now or are increasingly coming with CW2 and Stealthburner so you are on the right path with those. But you can save some pain if you build Tap in right from the start even if it was not in your kit. Closely related to this is the CNC tap mount. I will cover that below.
Adaptive Bed Mesh. Maybe not the right place to mention this but the increased accuracy of Tap (compared to the contactless probe I was using) meant a more accurate bed mesh before every print and therefore a significant improvement in bed adhesion and print quality. Thave also led me to adaptive purge and adaptive bed mesh. The adaptive bed mesh means even better print quality and reliability of the bed adhesion.
Since adaptive bed mesh is a software upgrade you do not need to worry about this in your build but it does work well with Tap so I mention it only to reinforce the benefit of Tap.
Everything you need is here… Klipper Adaptive Meshing Purging
LED Bars in the top front and sides. This might seem out of place because it is not mission-critical but man does lots of light make life so much better. I strongly recommend adding LED light bars right from the start. Since it will be in the early days you need to do troubleshooting. Being able to see inside the machine can be a huge benefit.
I initially used WS2811 LEDs. Those are the 24v versions of the WS2812. I have subsequently switched to WS2812 everywhere because I fried 2 Octopus controllers with wiring errors that shorted the port on the MCU. The ports are not forgiving to those kinds of errors so save yourself the trouble and use the WS2812. I thought using the 24V variants was smart to run a lower current and avoid more drain on the 5VDC system. But it was not worth frying the boards over. The good news is that f you understand what you have done and don’t fry too many ports on the board, there are spares and you can carry on. Of course, I did not, and I fried enough of the board I needed to get new ones.
When I had my first Voron up and running and wanted to print LED light bars to mount the LEDs up in the top of the machine, I was still struggling to solve many of the issues I had (many covered here in this story) one of them was having difficulty printing ABS well. I found the LED bars that I tried to download and print were difficult. So I designed a much lighter and thinner LED bar/holder which prints well and much faster but also wastes less material if it fails.
I used these LED and I feel they are great quality… BTF-LIGHTING WS2812B ECO RGB
[ I will add links here to my design and the LED here ]
On a side note, the WS2812 variants allow you to change colours and use colour as an indicator. But honestly, I don’t find that too useful. If I did it again, I think I might get just super bright white LEDs (daylight bars).
Nozzle Wipe Brush. Again not mission critical but helps with getting prints going and succeeding with less involvement. I found it like an odd project finding some brass brushes and cutting them down. Figuring out how to position them in the machine. But once it is done it is carefree and super reliable.
[ I will add links to my design and the brushes I used here ]
USB Cameras. Firstly, for me, this is a must. Super easy to implement and makes working away from the printer so much better. Just seeing it can give you so much operational information. Plug in a camera and it works! But here is what I want to communicate about what I learned about it…
I initially installed a random camera I purchased on Amazon for $20 onto the rear gantry. I ran the wires through the cable chain down into the bottom of the machine. This was fantastic. The camera therefore moves with the print head and you always have a prime view of the print. One drawback was you couldn’t see the print head when parked at the back of the machine or the nozzle wipe. However, here is the thing, I guess the wires that are used on those cheap USB cameras are not meant for continuous movement and the first one expired after less than 500 hours of printing. By then I had done the same setup in my second Voron and that one eventually failed too. So I bought 2 more cameras, designed a new mount, and moved the cameras to the top front centre of the machine. Just inside the doors. I designed my mount for that with a snap-off head so that if the print head ever manages to collide with it, the camera should pop off the mount.
When I built my #3 and #4 machines, those cameras had gone up in price so I ordered a different $20 model. I wired them in and built the machines. When I was ready I powered them up and for several hours I troubleshooted what was preventing my pi from communicating with the Octopus MCU. Eventually, I tried with the USB camera disconnected and they worked. I spent a few more hours trying to figure out why that was and how to avoid it. In the end, I just bought the same cameras I had on my first two machines at a higher price (then $30).
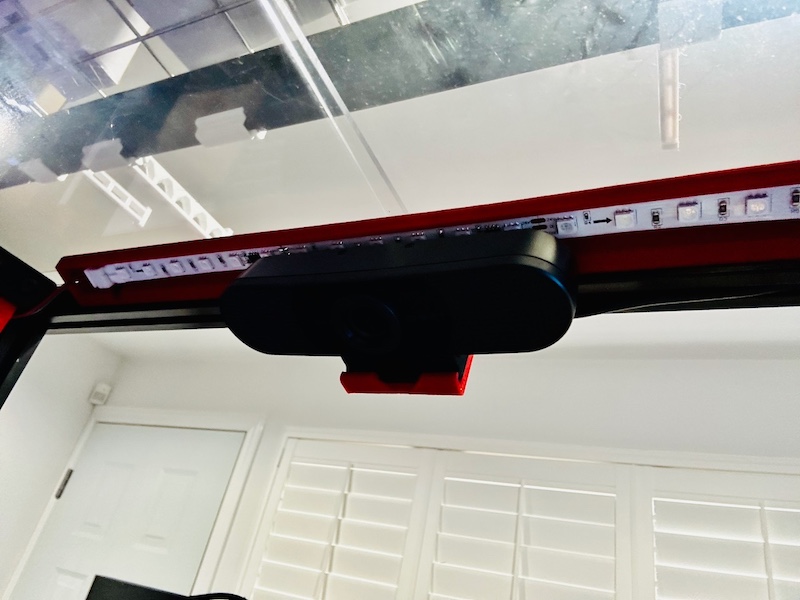
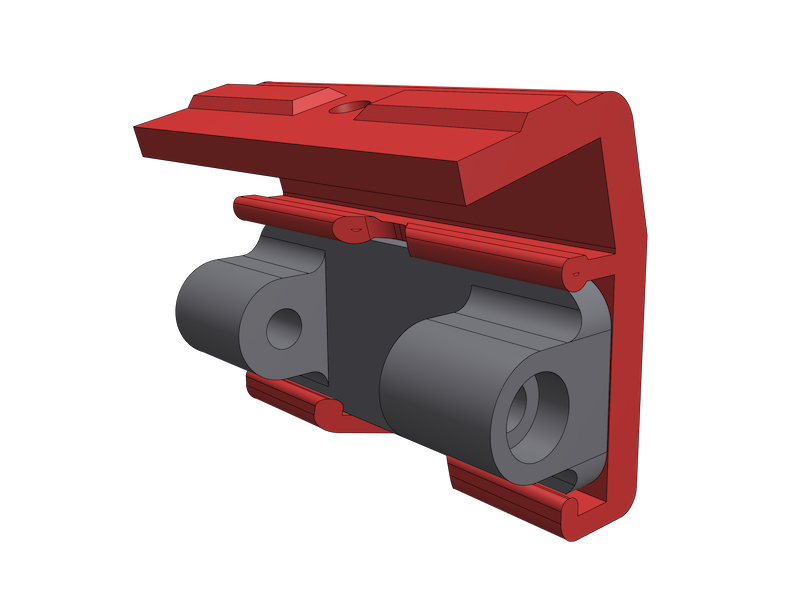
When I built #5 and #6 I tried two different cameras that I had ordered earlier from Aliexpress. Those cameras worked but to my surprise, they had a much wider viewing angle. I hadn’t thought to consider that when buying the cameras. A wider viewing angle works but makes it much more difficult to see details of the print.
This is the camera I am using now in 6 Vorons with great success… EMEET 1080P Webcam
[ add links to cameras and mount ]
Quick Release Panel Latches. I resisted this for a while just because I did not want to spend the time printing them and installing them. I so wish I had done it earlier. What a significant QOL improvement. I built 3 through 6 with these and it is so much better when you are doing your initial startup, troubleshooting and servicing.
Quick-release snap latches here.
Removable Doors. Do not install the default door hinges. I did and I thought for the longest time, “I do not need removable doors, the doors are not difficult to work around”. But I was so wrong. Once the doors just lift off, you can remove them on a whim and return them just as easily. So now I have the doors off all the time, especially for cleaning inside my machines and also for any servicing. I highly recommend installing removable door hinges.
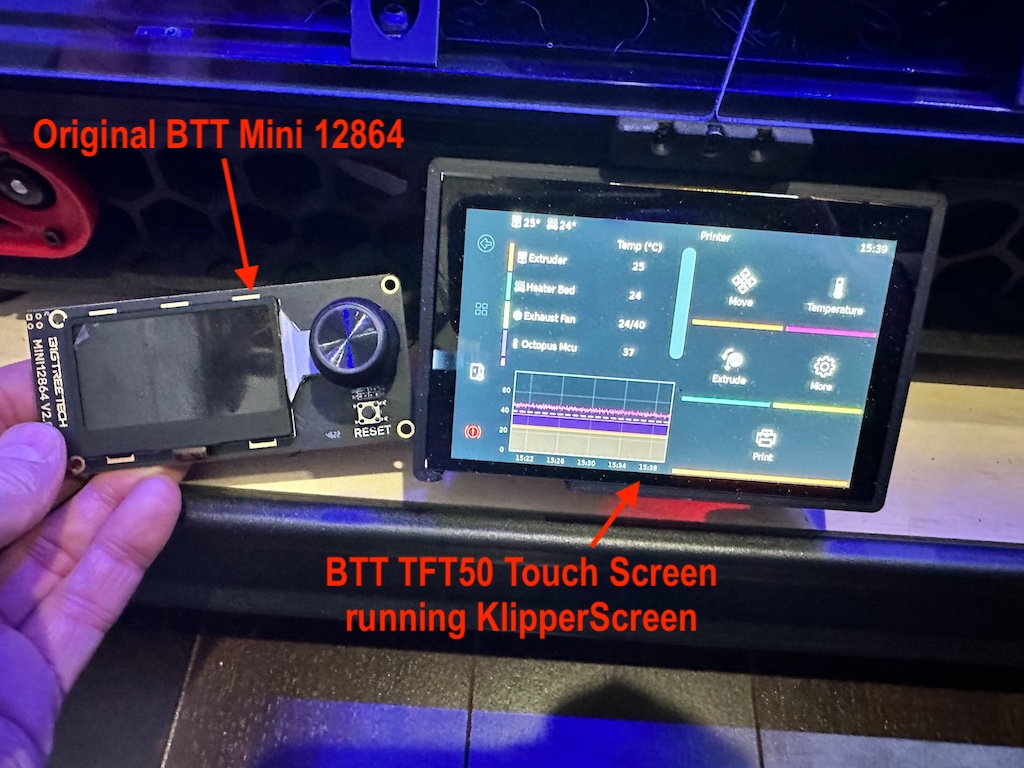
BTT TFT50 LCD Display. Or any larger LCD touch screen. Because the original screen is useless or near useless, and I then discovered having the touch screen and Klipper screen functionality makes the LCD a must-have for monitoring and operating the machine directly. Makes everything much easier especially z_calibrate.
Smart Plugs. Smart plugs are my solution to remotely stop and reset my machines in an emergency. More than once I have used them to cut power when I can see on the webcam that things are going sideways. And, I have one controlling my exhaust fan because inevitably I remember after the fact that I forgot to turn on or turn off the fan. So easy to do remotely.
I have used a lot of smart plugs and I have a lot of smart plugs on a lot of devices. But all of my printers and the exhaust system fan are now using the Kasa Smart plugs. These plugs seem exceptionally reliable compared to many others I used (mostly from Aliexpress). And, therefore I do not hesitate to recommend them.
This is the model I am using… Kasa Smart Plug by TP-Link (HS103P4)
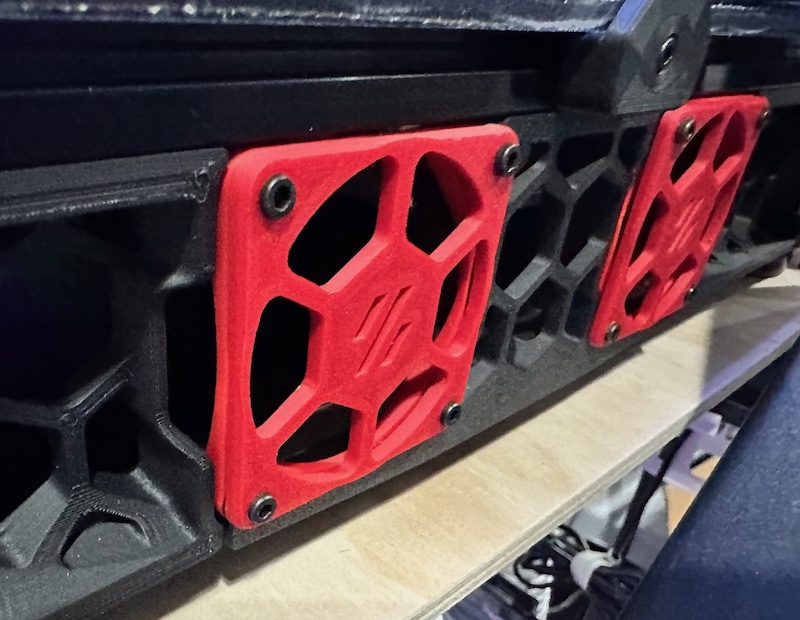
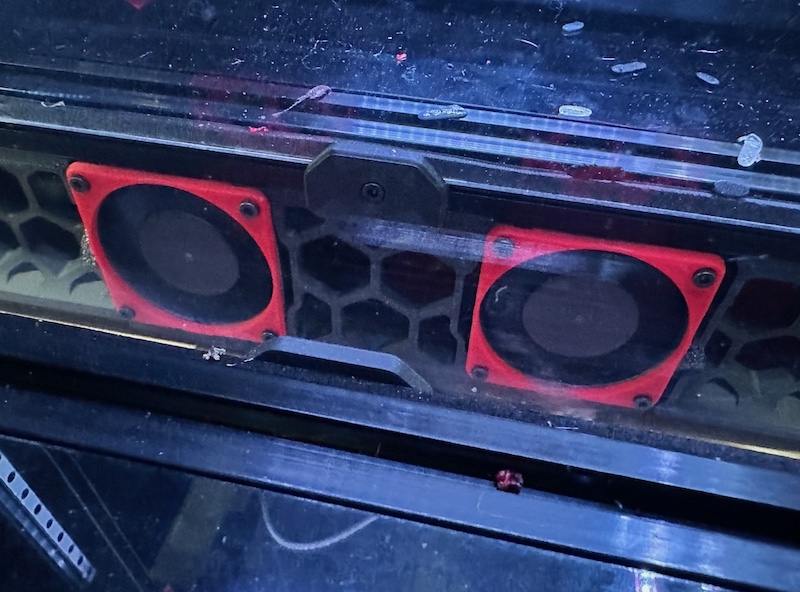
Silence the Controller Fans. Get rid of the accent covers for the MCU bottom case fans, OMG silence!! It is truly golden. What a simple QoL improvement.
BTT SFS (smart filament sensor), because it stops the printer when things aren’t right. Fantastic. But make sure the mount you use for the sensor has no movement at all. If the mounting bracket moves you will get a false reading don’t he sensor.
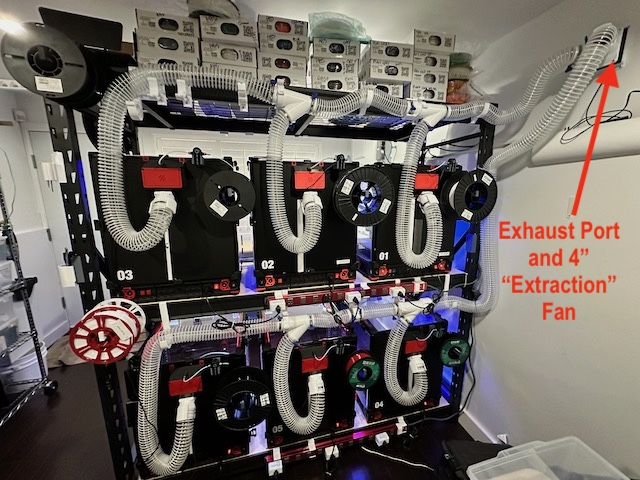
External venting (exhaust system to outdoors), ABS gave me a headache.
Sensorless homing, Software enhancement. Absolutely awesome for me. I had a microswitch fail AND an end-stop wire in the wire harness fail. With the sensorless homing (and Tap), there are no more microswitch end-stops. It just makes sense.
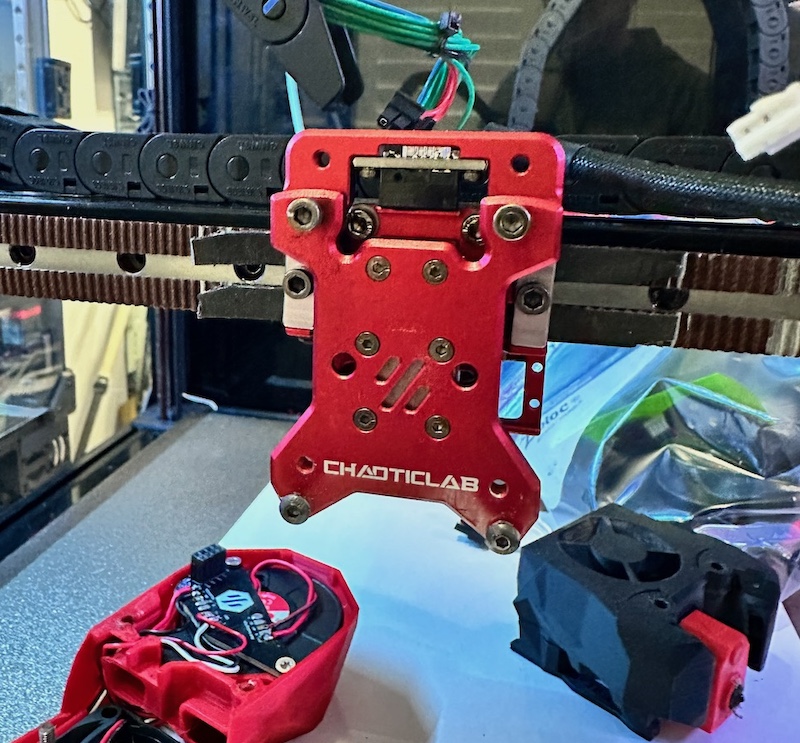
CNC Tap. As noted above, I had heat creep issues and while I have solved that, I still feel there is a place for the CNC Tap mount. One of my rationalizations for it is that it really does not cost much more than building a printed tap and the convenience of the metal mounts for the belts is almost priceless. I struggled to get the belts through the printed mount and keep them from slipping. With the CNC mount the belts are easy to install and locked down.
I have used the ChaoticLabs version which is great but requires 5VDC. I did not have the newer SB PCB and therefore did not have 5v at the headers for the tap PCB. So I had to jump 5V over and it is a little less than desirable. I also ordered some DodoLabs mounts and those included the Tap PCB which accepted 5v through 24v so… problem solved.
Future:
EBB CANbus, to eliminate the wiring harness and cable chains. This will reduce failures and reduce the mass of the print head/carriage. It also allows some other benefits such as a permanently installed acceleration sensor. And, the use of a hot-end fan that has a built-in tachometer.
Better acceleration tuning, once CANbus is implemented.
HE Fan with Tach (4 pin), once CANbus is implemented. This allows the operating system to know when the hot end fan fails and stop the print. This will save the hot end.
BTT SFS v2 – I have them, just need to install them.
Kinematic Bed Mounts – I have them, just need to install them.
